12+ Things You MUST DO Before Changing WordPress Themes

Are you wondering what you should do before you change WordPress themes?

When switching your WordPress theme, there are few very important steps that you must take to ensure the process is smooth, and you don’t lose any important data. 

In this WordPress checklist, we’ll share the top things you must do before you change WordPress themes.
12+ things you must do before changing WordPress themes

Editor’s Note: If you’re looking for step-by-step instructions on how to switch themes, then please see our beginner’s guide on how to properly change your WordPress theme.

Switching a theme is an important decision that every website owner makes at least once every few years.

Of course you have to decide your reasoning of why you’re switching, and pick a theme that suits all your needs.

We have a list of best WordPress multi-purpose themes and best WordPress blog themes that you can check out if you’re looking for recommendations.

Once you have chosen the theme that you want to switch to, it’s important that you follow the checklist below to ensure that you don’t lose any content or data during the process.

1. Make Note of Any WordPress Theme Customizations

Some WordPress website owners will customize their WordPress themes by adding code snippets directly to their theme files. Code snippets can be a great way to add new features to your website that aren’t part of the stock theme.

But, if you’re adding those snippets directly to your theme files, it can be easy to lose track of them.

If you or a web developer made these changes, then make sure you go through your current theme files and note all of the additional code that’s been added. 

For adding code snippets in the future, we always recommend to use a site-specific plugin or a code snippets plugin. This way, you can keep those snippets even if you change themes later. For more details, see our beginner’s guide on pasting snippets from the web into WordPress.

2. Get Current WordPress Theme Performance Metrics 

Before changing your theme, you should check your current website’s loading speed and performance. This lets you compare any differences in the page load time after you switch themes.

Since WordPress speed and performance plays an important role in user experience and WordPress SEO, you need to ensure the new theme is faster than what you’re using now. 

You can easily check your current website speed metrics using a WordPress speed testing tool such as IsItWP’s free website speed testing tool.
For more details, see our guide on how to run a website speed test.

3. Make Note of Current Theme Sidebars and Widget Areas

Sidebars are used for adding different widgets to your website, like email newsletter subscription forms, social media buttons, popular posts, and more.

Since every theme has different widget areas, your widgets may unexpectedly move or disappear from your site if you switch themes.

That’s why it’s important to make a note of what widgets you’re using in your WordPress sidebars and any other widget areas of your website before you change themes. Then you can easily replicate them after switching.

If you’ve added any custom code or shortcodes, then make sure to copy this code and save it somewhere safe so that you can use it with your new theme. 

4. Copy Existing WordPress Tracking Codes

Many users will add analytics tracking code directly to their theme files. Some WordPress themes also allow you to add tracking codes directly into your theme options panel.

It’s a common mistake to overlook these important tracking codes. 

You need to make sure you copy all of your website tracking codes you’re using for analytics, advertising, and more, so you can add them to your new website. 

If you want to make it easy on yourself, then we recommend using a plugin like MonsterInsights to install Google Analytics in WordPress.

By using MonsterInsights, you can rest assured there will be no interruptions to your analytics or lost data. You’ll also unlock bonus tracking like link clicks and button click tracking, WordPress category and tag analytics, author tracking, and much more.
MonsterInsights

For all other tracking codes, you can use the Insert Headers and Footers plugin. For more details, see our guide on how to add header and footer code in WordPress.

5. Back Up Your Current WordPress Website

It’s always a good idea to back up your website on a regular basis. Before changing your theme, you should completely back up your posts, pages, plugins, media, and databases.

The easiest way to do this is by using a WordPress backup plugin to create a backup of your entire site. For more details, see our guide on how to backup your WordPress site with UpdraftPlus.

This will help ensure you can easily recover your website if anything goes wrong when switching themes. 

6. Put Your WordPress Site Into Maintenance Mode

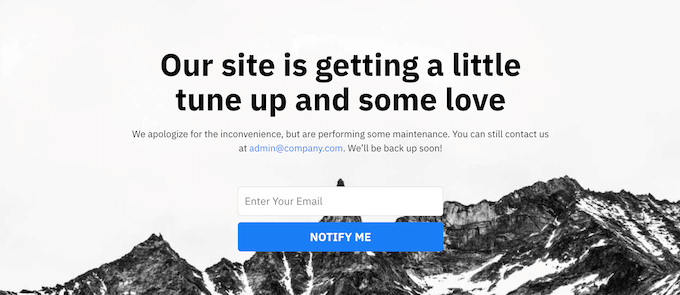
When making changes to your site, it’s always a good practice to put your website into maintenance mode. Maintenance mode lets you display a user friendly notice to your visitors.
Maintenance mode page example

This helps prevent your visitors from seeing your website when it’s half-finished or under construction.

To do this, we recommend using the SeedProd plugin. It’s the best drag and drop WordPress page builder used by over 1 million websites.

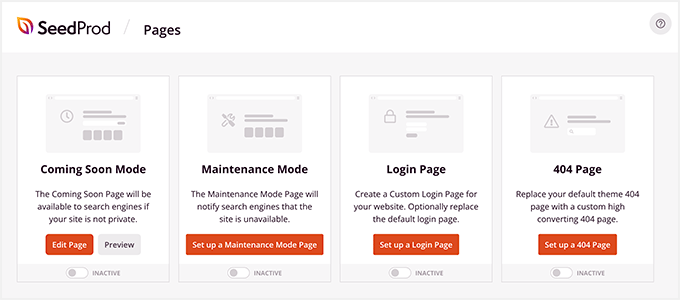
It lets you easily create custom maintenance mode pages, landing pages, coming soon pages, 404 pages, and more. 
SeedProd

For more details, see our guide on how to put your WordPress site in maintenance mode.

7. Test All Functionality and Installed WordPress Plugins

Once you have a new WordPress theme activated, you need to ensure you have the same functionality as before and that all of your old plugins work with your new theme.

You can start by adding back the code snippets that you copied from your old WordPress theme files. For more details, see our beginner’s guide to pasting code snippets into WordPress.

Then, spend some time using the features of your site that are powered by WordPress plugins. If you’re experiencing any errors at this time, see our beginner’s guide to troubleshooting WordPress errors.

8. Test New WordPress Theme Across Browsers and Devices

Cross-browser testing will help you make sure your new website looks good on different browsers, screen sizes, operating systems, and mobile devices.

Most of your visitors will probably use Google Chrome to visit your WordPress blog. However, other web browsers like Firefox, Microsoft Edge, Safari, and more are still used by hundreds of millions of users worldwide.

If your new website doesn’t work right on one of those browsers, then you’re missing out on visitors and traffic. 

Luckily, you can use all kinds of cross-browser testing tools to see how your website looks across different browsers and devices.

For more details, see our guide on how to test a WordPress site in different browsers.

9. Delete WordPress Plugins You No Longer Need

Some WordPress themes will pre-install plugins when you install the theme. Some of these may be useful, but other times you won’t need them.

Simply go to Plugins » Installed Plugins to see if your theme has added any new plugins.
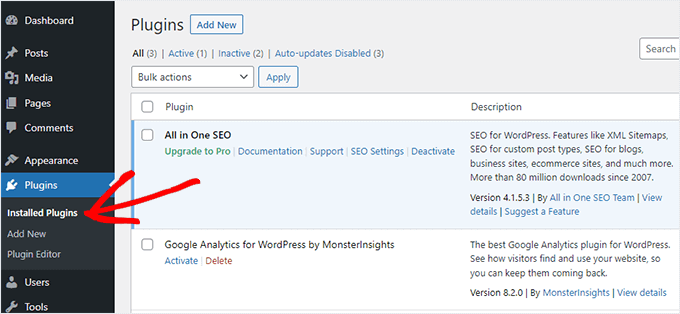
List of installed plugins

Now is also a good time to go through your entire plugin list to see if any plugins are worth deleting. 

If you’re looking for high quality plugins to use with your new theme, then see our picks of the must have WordPress plugins

10. Let Your Users Know Your New Website is Live

Once you’re ready to make your new WordPress theme live, you can turn off maintenance mode.

You should also get in touch with your readers to tell them about your new website. This will prepare your audience so that they’re not confused by any big design changes, and it will also help to keep your subscribers engaged and returning to your site to see the new design.

Here’s an example post we shared on Facebook about our new website redesign.
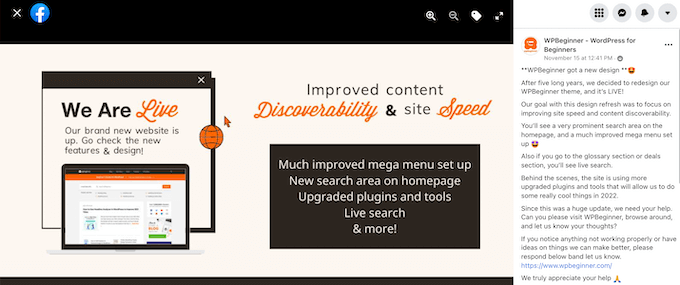
Redesign announcement example

We recommend notifying your audience via your email newsletter, social media, and push notifications.

If you’re looking for more ways to promote your site, then see our guide on how to share your blog posts with readers.

11. Test Loading Speeds for Your New WordPress Theme

Once your new theme is live and you’ve gone through the steps above, it’s time to do another speed test. Ideally, your new website will be faster and get better scores in your speed test.

To do this, simply use the same website speed tool you used earlier and compare the results. 

If the new theme is slower than your old theme, then make sure you run multiple tests, test from different areas, and check to see if you have any caching or firewall settings that could be causing the dip. 

12. Monitor Your WordPress Website Bounce Rate

Bounce rate is the percentage of visitors who land on your website and leave without continuing to a second page. A high bounce rate means that you didn’t convince your visitor to stay on your site long enough to take action.

After you switch themes, it’s important to monitor your bounce rate. Some themes are simply friendlier at helping visitors navigate around your site.

If your bounce rate has gone up since switching theme, then you’ll want to work to lower it. You can do this by improving your navigation menus, adding more internal links, adding a popular posts widget, and more.

For more details, see our guide on how to increase pageviews and reduce bounce rate in WordPress

13. Listen to Reader Feedback to Improve Your WordPress Website

Finally, it’s important you listen to reader feedback after you switch to a new theme. Some readers may love or hate certain parts of your design. 

You don’t have to listen to every reader and make the changes they suggest. But, if there’s a group of readers who are experiencing the same issue, then it’s probably worth looking into.

You can collect visitor feedback by adding a contact form to your website, or running a survey asking for reader feedback on your new design.

The easiest way to do this is by using WPForms. It’s the best WordPress survey plugin in the market used by over 5 million websites. 
WPForms

It lets you easily create engaging survey forms with the drag and drop builder.

Plus, the reporting section automatically creates beautiful reports to help analyze your results. 
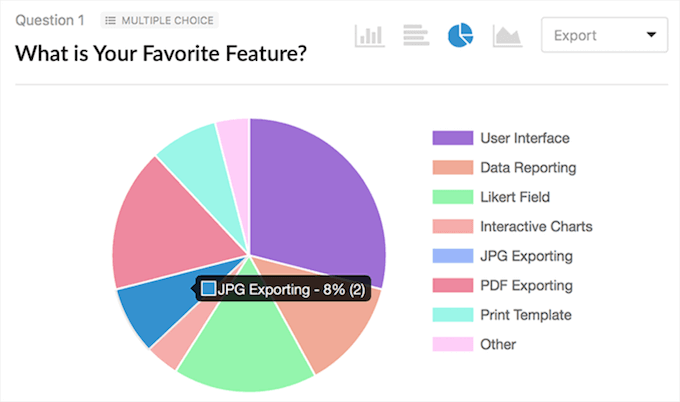
For more details, see our guide on how to create a survey in WordPress.

We hope this article helped you learn exactly what you should do before switching WordPress themes. You may also want to see our guide on how to choose the best WordPress hosting and our expert picks of the best AI chatbot software for your website.

If you liked this article, then please subscribe to our YouTube Channel for WordPress video tutorials. You can also find us on Twitter and Facebook.

Checklist: 11 Things To Do Before Launching a WordPress Site

Are you ready to launch your WordPress site?

Each day thousands of new sites appear on the web. That’s why you want to make sure that your website stands out and shines from the very beginning.

In this article, we have prepared a handy checklist of things you should do before launching a WordPress website.

Launching a WordPress site

Getting Started

Before you start, it’s crucial to select the right hosting for your WordPress website.

While most sites are fine with basic WordPress hosting, in some cases you may need managed WordPress hosting.

How can you tell what type of hosting you need? We recommend you read these guides:

For the sake of this article, we will assume that you have already installed WordPress and everything is ready.

Having said that, let’s take a look at the things you should do before you launch your WordPress site.

Video Tutorial

Subscribe to WPBeginner

If you don’t like the video or need more instructions, then continue reading.

1. Install a WordPress Backup Solution

Install a WordPress backup solution

You should always set up a WordPress backup solution on your website. Backups are like an insurance policy. Should anything go wrong, you can always recover your site.

There are plenty of good free and paid WordPress backup plugins that you can set up on your website within minutes.

You want to make sure that the backups are automatically scheduled and are saved on a cloud storage service like Dropbox, Amazon S3, or Google Drive.

UpdratPlus is a good choice because it allows you to create unlimited cloud backups of your WordPress site on a schedule you choose. While the free version has a lot of features, we recommend upgrading to UpdraftPlus Premium.

2. Secure the WordPress Admin Area

Securing WordPress admin area

As the most popular content management system in the world, WordPress is a big target for hackers. Many WordPress sites run without having to face any of these threats for years, but it is always better to be prepared than to be sorry.

You can block many common security threats by protecting your admin area from unauthorized access. Take a look at our list of tips to protect your WordPress admin area.

For all of our sites, we set up a Sucuri firewall. This works well, and we discovered it helped us block 450,000 WordPress attacks in three months.

Sucuri is like having a private security system and guards at your physical business location. It is definitely the way to go if your site is a business.

3. Check Your Site for 404 Errors

Fixing 404 Errors

On a brand new website, you need to make sure all pages on your website are loading properly, and there are no missing links. Otherwise, your visitors will see 404 errors, which creates a bad user experience.

If you have already added your site to the Google Search Console, then you can use it to find pages giving a ‘404 not found’ error in your crawl report.

Otherwise, you will have to manually browse your site and make sure everything is working as expected. If you have a lot of content, then you can first check that your most important pages are loading, such as your about, contact, registration, and login pages.

You should also set up email alerts for 404 errors on your WordPress site. This way you can easily monitor and fix bad links as you discover them.

4. Make Email for Your WordPress Site Reliable

Make sure your WordPress emails are sent and delivered

Failed email is one of the most common WordPress errors. Some of your email notifications may deliver, but some of them may not. That’s a problem because you rely on email to keep your website running smoothly.

This is because many email service providers identify email sent by WordPress as spam. Also, your hosting server may not be properly configured to use the PHP mail() function.

Both these problems can be fixed by switching to SMTP, the industry standard for sending email. Simply follow our guide on how to fix the WordPress not sending email issue.

5. Check All Forms on Your Site

The next thing you need to do is to make sure that all forms on your site are working. You’ll have to test your contact forms, comment forms, email subscription forms, and so on. Make sure every form on your site works properly.

You should also check your email list and send test emails to confirm that they are delivered to the right mailing list.

By the way, if you haven’t already started building an email list, then you should read our article on why you should start building your email list right away.

If you run a multi-author blog, membership site, or online store, then you’ll also need to check your login and registration forms.

You should also log in to your website with different user roles to check if you need to remove unnecessary items from the WordPress admin area for user accounts.

6. Make User Experience Flawless on eCommerce Websites

Checking eCommerce features

If you are running an eCommerce store, then you need to check the user experience aspects of your website more thoroughly.

You should put yourself in your user’s shoes and try to browse your products, add them to the cart, and even do a test transaction. Make sure everything works smoothly and flawlessly.

If you are selling digital goods, then make sure they are delivered promptly. For physical goods, you will need to check your systems for the smooth completion of orders.

Make sure you also check that receipts, invoices, shipping cost calculations, and taxes are all working correctly.

7. Check Images, Videos, and Sliders

Images and videos are an important part of your website and make the modern web more interactive. However, you’ll leave a bad impression if you haven’t added them correctly.

Check that all images on your website are loading properly. You should also make sure they load quickly by following our guide on how to optimize images for the web, or your site’s performance may be affected.

You should play the videos embedded on your website using different devices and browsers to make sure that they work as intended.

If you are using a WordPress slider plugin, then make sure that the slider is working on all browsers and devices just as you intended it to be.

8. Test Social Integrations

Social Media Logos

Social media plays a very important role in the successful launch of any product. Don’t miss out on this opportunity to interact with your users.

Make sure that users can find ways to connect with your website on social platforms like Twitter, Facebook, YouTube, and Instagram.

You should confirm that social sharing plugins on your website are working properly.

It’s also good to enable Twitter Cards and Facebook Open Graph meta data, and add social share buttons to your WordPress website.

9. Test Your Website’s Performance

Performance issues are usually the main concern during the development phase of a website. Now that you are about to launch your website, it’s time to test your website one more time.

Check your website for speed using tools like Pingdom and Google Pagespeed tool. Speed is not only important for user experience, it is also an important SEO factor.

One of the best ways to speed up your WordPress site is to install a caching plugin like W3 Total Cache or WP Super Cache and use a CDN like MaxCDN.

Most managed WordPress hosting companies like WPEngine come with built-in caching and include CDN and backups as part of their plan.

Finally, check our ultimate guide to boosting WordPress speed and performance. In this guide, we share the most useful WordPress speed optimization tips to speed up your website.

10. Install Google Analytics

Install Google Analytics

You cannot improve without knowing how your readers interact with your website.

Google Analytics is the easiest way to track this. It tells you where your visitors are coming from, what they see on your site, when they leave, and how well your site is doing.

It is important that you install Google Analytics before the launch, so you can track how your launch efforts performed. It will also help you keep a historical record of the day when you launched and how much your site has grown since then.

If you find Google Analytics a bit overwhelming, we’ve got you covered. Take a look at our Google Analytics beginner’s guide. In this article, we explain why Google Analytics is important, how to install it, and how to make sense of your traffic reports.

11. Check Your SEO Settings

SEO

Search engines are among the top source of free traffic for most websites. Optimizing your website for search engines can help you grow your traffic steadily after the launch.

We use the Yoast SEO plugin on all our websites. It is comprehensive site optimization software for WordPress. Take a look at our tutorial on how to install and set up the WordPress SEO plugin by Yoast to maximize your site’s SEO potential.

Finally, take a look at our ultimate WordPress SEO guide for beginners. And if you are about to launch an online store, then we have a WooCommerce SEO guide as well.

We hope this article helped you prepare your checklist of things to do before launching your WordPress site. You may also want to learn some proven ways to increase your blog traffic, or see our list of 40 useful tools to manage and grow your WordPress blog.

If you liked this article, then please subscribe to our YouTube Channel for WordPress video tutorials. You can also find us on Twitter and Facebook.

11 Tips to Optimize Your Blog Posts for SEO Like a Pro (Checklist)

Do you want to learn how to optimize your blog posts for SEO?

By optimizing your posts for SEO, you can improve your search engine rankings and get more traffic to your WordPress site. 

In this article, we will share our best SEO tips to help you optimize your blog posts for SEO like a pro. These are the tips we use on our own blogs, which get millions of visitors from search engines.

11 tips to optimize your blog posts for SEO like a pro (checklist)

Why Optimize Your WordPress Blog Posts for SEO?

Optimizing your blog posts for SEO helps you consistently get more traffic to your WordPress website from the search engines.

Since search engines are often the largest source of website traffic, this can be very valuable to your blog, online store, or small business website.

If you’re simply publishing your blog posts and not optimizing for WordPress SEO, then you’re limiting the amount of traffic you can get and money you can make. 

With that said, here is our blog post optimization checklist to optimize your blog for SEO like a pro.

1. Plan Your Content with Proper Keyword Research

Many beginners just use their best guesses to write about topics they feel their users would be interested in.

You don’t need to rely on blind guesses, especially when you can do keyword research to find out exactly what your users are looking for.

Keyword research is a technique used by content creators and SEO experts. It helps you discover topics your users are interested in based on the search engine data.

Then, you can use these keywords to plan your content strategy. This will ensure that you write about topics that people are actually looking for, and it’s a great way to build an engaged audience.

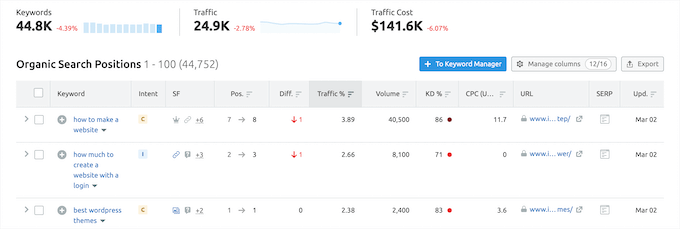
We recommend using keyword research tools like Semrush. They offer in-depth keyword data, competition analysis, keyword position tracking, and tons of other useful features.

Semrush keyword data exaxmple

If you are using Semrush, then you would want to check out their SEO Writing Assistant tool. It helps you discover LSI and related keywords, readability, language tone, and average article length.

For detailed instructions, see our guide on how to do keyword research for your blog posts.

2. Find Semantic Keywords for Your Focus Keyword

After you have done your keyword research and discovered keyword ideas, it is time to pick one that has the highest search volume and low competition.

This will be your focus keyword. It’s the search phrase that your users are most likely to use to search for your article.

If you are using All in One SEO, one of the best WordPress SEO plugins, then you can set the focus keyword in your article’s SEO settings. This allows you to see how effectively you have used it in your article.

Add focus keyphrase

Next, you need to find the Latent Semantic Indexing (LSI) keywords. These are the searches related to your focus keyword.

The easiest way to find them is to simply enter your focus keyword in Google Search and scroll down to the bottom of the results where they’ll be listed.

LSI keywords in Google search

You need to incorporate as many of these keywords in your content, so you can have the most complete content for your readers.

It’s very important that you don’t try to stuff them in your content. This would look odd to your users, and search engines are pretty good at detecting keyword stuffing.

For more details, you can see our complete guide on how to properly use a focus keyphrase.

3. Write an Effective Blog Post Title

The title of your blog post is extremely important for search rankings.

A good blog post title makes your article more relevant to the search query. More importantly, it motivates users to click on your article when they see it in the search results.

You can make your blog post title more SEO-friendly by using your focus keyword in the title.

Create SEO friendly title

Aside from adding your focus keyword, we also recommend making your headline catchy and click-worthy. That’s because your organic click-through rate (CTR) plays an important role in SEO.

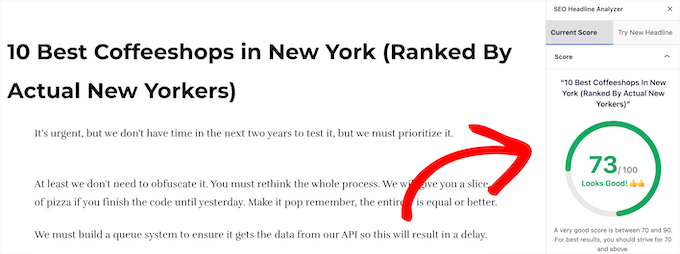
The best way to do this is to use a headline analyzer tool. This will evaluate your headline and offers tips to improve your headlines to make them more engaging and click-worthy.

AIOSEO has a built-in headline analyzer tool that will give your headline a score and offer tips to make your headline even better.

AIOSEO headline analyzer

For more details, see our guide on how to use a headline analyzer in WordPress to improve SEO titles.

4. Make Internal Linking a Habit

Once you have blogged for a while, you will have enough content that you want users to read. With internal linking, you can send new readers to check out your older relevant posts.

Internal linking is a great way to develop a contextual relationship between your new and old posts. It also allows you to pass relevant link juice to your older articles.

WordPress makes it easy to search for your old posts right inside the post editor. Simply select the text you want to link and click on the link button.

A text pop-up will appear below your highlighted words. Then, you can start typing to search for the older articles you want to link to.

Add a link to a post

To learn more, see our beginner’s guide on how to add a link in WordPress.

Making internal linking a habit will make sure that your on-page SEO is good and that your older articles continue to get new links.

If you want an even easier way to manage your internal links over time and easily add new links to old posts, then we recommend using AIOSEO.

It includes a unique link management feature that lets you add links to your old and new content without having to open up the post. Plus, it provides link recommendations, detailed link reports, and much more.

To set up the plugin, see our guide on how to setup All in One SEO for WordPress correctly.

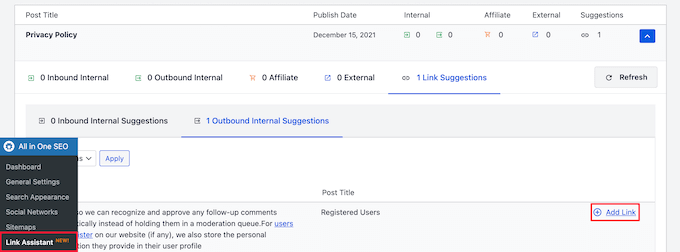
After that, navigate to All in One SEO » Link Assistant in your WordPress dashboard.

This brings up the link assistant dashboard. It offers suggestions for relevant posts you can link to and the anchor text to use. Simply click the ‘Add Link’ button, and the link will automatically be added to your post. 

Link assistant add link

Essentially, you can do the same thing manually, but if you’re looking to save time and get a big picture perspective on your internal and external links, then using AIOSEO is a great choice. 

5. Add Images and Videos to Your Blog Posts

Adding images and videos to your blog posts makes them more engaging and interesting for your readers. Content that readers love also tends to rank higher in the search results. 

You can add fun images, image galleries, tutorial images, and more.

For example, SeedProd adds all kinds of engaging screenshots and images to break up longer blog posts.

SeedProd blog post image example

When adding images, you want to be careful about image copyrights. Often beginners copy images from other sites to use, which can get you in legal trouble if you do so without proper permissions.

Don’t worry, there are plenty of places to find royalty free images to use in your blog posts. 

You can also use your original photographs or use other web design software like Adobe Photoshop or Canva to create your own.

Once you’re finished creating your images, you need to make sure to optimize your images for SEO. For more details, see our guide on how to optimize images for search engines.

Videos are even more engaging than images. You can convert your blog posts into videos by creating slideshows, vlogs, and more.

MonsterInsights embeds tutorial videos directly into their posts, for users who prefer to watch, instead of read.

MonsterInsights video embed example

If you want to create professional videos, then see our picks of the best video editing software.

However, you should never directly upload videos to your blog posts. WordPress is not optimized to serve videos, and your WordPress hosting service can’t handle them.

Instead, we recommend uploading your videos to a video hosting site like YouTube or Vimeo. These sites are built to host your videos and can even be an additional traffic source. 

To learn more, see our guide on how to easily embed videos in WordPress blog posts.

6. Add a Meta Description to Your Blog Post

The meta description is an HTML meta tag that you can add to any page. Its purpose is to provide a short description of your article for search engines and other crawlers.

Some SEO experts believe that the meta description tag has become irrelevant. However, many others would disagree. At WPBeginner, we recommend using the meta description for all of your posts.

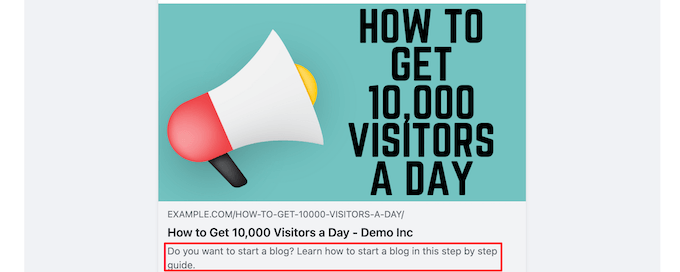
A good meta description can explain a lot more about an article. Social media websites like Facebook, Twitter, and LinkedIn also display it when your articles are shared on those platforms.

You can even add Facebook Open Graph Meta Data to control your description when your post is shared on Facebook.

Facebook meta description example

Since now you know that people will be reading your meta descriptions, you want to make sure that it’s helpful.

You also want to mention your focus keyword at least once in the meta description for search purposes. The character limit for meta description is 155 characters.

Try to stay within that limit, or your meta description will be cut short after 155 characters. You also want to make sure to use your focus keyword earlier in the meta description rather than later.

Luckily, AIOSEO makes it super easy to add your meta description. Directly below the post editor, you’ll see a box where your description can be added.

AIOSEO meta description

To learn more, see our guide on how to add keywords and meta descriptions in WordPress.

7. Make Your Articles Easier to Read

Readability is an important factor considered by search engines. Articles that are easier to read often rank higher than articles that don’t offer a good user experience.

Computer and mobile screens are still not an optimal platform for reading.

This is why most users just scan through articles. In fact, studies found that users spend less than a second to decide whether they want to stay on a page or leave.

That’s a very short time for you to convince the user to stay and scroll through. By improving readability, you can make it possible for your users to scan an article quickly.

You can improve readability by using shorter sentences, smaller paragraphs, punctuation, headings, and bulleted lists. We recommend adding white space around text and using images to make your text read easier on the eyes.

If you are using the All in One SEO plugin, then it will automatically analyze readability issues and make suggestions for you in the analysis section.

AIOSEO readability analysis

You can also use online grammar checker tools like Grammarly to check for grammar, punctuation, and spelling mistakes on the fly.

To learn more, see our guide on how to add and improve the readability score in WordPress posts.

8. Use Categories and Tags to Organize Content

Categories and tags help you sort your content not only for yourself, but for the readers and search engines.

The problem is that many WordPress beginners often end up using them incorrectly.

If you think about your website as a book, then categories would be the table of contents and tags will be the index part of the book.

Categories are used to divide your content into major topics discussed on your WordPress blog. Tags, on the other hand, are the topics discussed in an individual blog post.

To learn more, see our beginner’s guide on using categories and tags for maximum SEO benefit.

9. Aim to Be The Featured Snippet in The Search Result

Google tries to helps people searching answer their questions as quick as possible. As part of this effort, they have introduced the featured result or answer box.

This is the highlighted search result that appears on the top. Google generates a custom snippet from the article’s content highlighting the part that their algorithms believe to be the answer of user’s query.

Google featured snippet

According to research conducted by Advanced Web Ranking, Answer boxes secure almost 32.3% CTR. This makes them immensely important for your SEO strategy.

There is no specific set of instructions provided by Google on how to get the featured snippet. Their recommendation is to improve your content and make sure that it offers the information users are seeking.

To learn more, see our guide on how to appear in Google answer boxes with your WordPress site.

10. Make Your Blog Posts Comprehensive

Search engines love articles that cover a topic with great detail. This is why we asked you to gather the semantically related keywords (LSI Keywords) as part of your content planning step.

These related keywords give you an idea of different variations of user searches regarding that particular topic. By covering those keywords in your article, you would be able to make it more comprehensive, informative, and useful.

You should use headings and subheadings to include those keywords and try to cover as much ground as you could.

Aside from LSI keywords, another tip to create complete content is to type your desired keyword into Google and then switch to the ‘Image’. You will see topic bubbles with a variety of keywords.

Google image search keywords

We recommend including these when creating your content, so you can have the most comprehensive content possible.

11. Optimize Older Blog Posts

Many beginners tend to forget about a blog post after they have published it. In fact, you are not done optimizing your blog post for SEO once it is published. 

Here are some things that you need to do after publishing your blog post:

  • Share it with readers – Share your new and old content with readers and subscribers. To learn more, see our guide on how to share your blog posts with readers.
  • Add internal links – Once you have published a post, you can go back to relevant old articles and add a link to your new blog post. This gives your new articles link juice while also allowing users to discover it more easily.
  • Track search rankings – You have optimized a post for SEO, but how do you keep track of its search rankings? See our recommendations of the best SEO rank tracker tools for keyword tracking.

We recommend optimizing old posts on a regular basis, so you can continue to improve your rankings.

We hope this article helped you learn how to optimize your blog posts for SEO like a pro. You may also want to see our guide on how to register a domain name and our expert picks of the best live chat software for small businesses.

If you liked this article, then please subscribe to our YouTube Channel for WordPress video tutorials. You can also find us on Twitter and Facebook.

21 Best Website Ideas to Launch an Online Side Business in 2022

Are you looking for website ideas to launch a side business in the new year?

There are tons of opportunities online with profitable website ideas that you can easily transform into a sustainable side income.

In this article, we’ll share the best website ideas to launch this year. We’ll also show you how to easily get started without a big investment.

Website ideas that you can launch this year

What You Need to Put Website Ideas into Action

It is a common myth that you need to be tech-savvy or a programmer to start a website. This was probably true in the 90s, but these days you don’t need any special skills to build a website.

Here is what you actually need to make a website:

  • A domain name. This will be your website’s address on the internet, e.g. wpbeginner.com).
  • Web hosting account. This will be your website’s home and where you’ll store all your website files
  • A website builder. We recommend using WordPress.org which is the best website builder powering more than 43% of all websites on the internet.

We recommend using Bluehost to make your website. They are one of the biggest hosting companies in the world and are officially recommended by WordPress.

They are offering WPBeginner users a generous 60% off discount on hosting with a free domain name and free SSL certificate. Basically, you can launch a website for $2.75 per month.

→ Click Here to Claim This Exclusive Bluehost Offer ←

They automatically install WordPress for you, and you can quickly start working on your website idea with in minutes. If you need more help, then follow the steps in our WordPress installation guide to set up your website.

That being said, let’s take a look at some of the most profitable website ideas to launch this year and turn them into a viable business.

Here is a quick list of website ideas that we’ll talk about. You can jump to the one that you find interesting or read as you scroll along.

1. Start a Personal Website / Blog

Start a personal website / blog

Blogs are a popular website idea that has been around for some time and still going strong. Entrepreneurs like Darren Rowse, John Lee Dumas, and Pat Flynn all started as bloggers and are now making six-figure incomes.

Our company’s CEO, Syed Balkhi, started this blog that led him to build an eight-figure business (see: WPBeginner income).

Launching a blog is pretty easy, and it can be on any topic that you are passionate about. The benefit of starting a blog is that you can later use it as a platform to launch many other website ideas.

There are also a ton of monetization options that make blogging a profitable website idea. You can use programs like Google AdSense to display ads, promote affiliate products, sell direct advertisements, or you can even sell your own products to your readers such as online courses, eBooks, etc.

Need help? See our step by step how to start a blog tutorial where we walk you through every step of the way.

If you need expert help, then we also offer a free WordPress website setup service where one of our WordPress experts will set up your blog for you.

2. Build an Online Store

Start an eCommerce store

Another booming website idea is to build an eCommerce store. A lot of folks think that it is probably too technical to get started, which is not exactly true.

You can easily start an eCommerce website with WooCommerce. It is the world’s most popular eCommerce platform that runs on top of WordPress.

It is super easy to use and allows you to sell any type of digital, virtual, or physical products that need shipping. You can easily accept online payments using PayPal, Stripe, or many other payment services.

For step by step instructions, you can follow our beginner’s guide on how to start an online store.

Need ideas on what to sell on your store? See our tutorial on how to source products to sell online.

3. Make a Membership Website

Membership website

Another popular website idea that is getting a lot of momentum is to create a membership-based website.

Basically, you restrict access to some content on your website that is only available for paid members. This could be an online course, members-only forums, audio or video content, or anything else.

The easiest way to do this is by using MemberPress. It is a WordPress membership plugin that helps you create subscriptions, restrict access, and sell membership plans on your website.

For details, follow our tutorial on how to make a membership website with step by step instructions.

4. Sell Online Courses

Sell online course website

Creating and selling online courses is another popular website idea that is growing really fast.

This growing website niche is fueled by the modern gig economy where people need to learn new skills to find new jobs, improve existing skillsets, or just learn something new as a hobby.

MemberPress is the best WordPress LMS plugin that allows you to easily create and sell online courses on your website.

5. Create a Dropshipping Website

Dropshipping

Dropshipping is another growing website idea that you can launch without much investment. A dropshipping store is an online store where you sell products, but they are shipped directly by the vendor.

This saves you from the hassle of managing and storing stuff, keeping up inventory, and shipping things. It also allows you to sell a wide-variety of products.

For more details, see our step by step guide on how to create a dropshipping business for beginners.

6. Make an Affiliate Website

Affiliate website

One of the most popular website ideas is to start an affiliate website.

Affiliate marketing is a referral arrangement in which an online retailer (advertiser) pays you a commission when users purchase their product from your referral link.

This is a massive industry which means you can make a niche affiliate website and start building upon it. You can find affiliate programs in nearly every industry, especially if you sign up for an affiliate program like Amazon Associates or ShareASale.

For example: you can create a website that’s focused entirely on reviewing all the newest women’s handbags, new internet routers, new smartphones, etc.

When users make a purchase based on your recommendation, you get a referral fee.

For a more in-depth discussion, see our beginner’s guide to affiliate marketing which has step by step instructions for new affiliate marketers.

7. Launch a Fashion Blog

Fashion blog

Fashion and lifestyle is another profitable website idea that has a ton of potential. There are a lot of fashion bloggers and influencers making six-figure incomes.

It’s better to have your own website instead of just being on social media, because there are more opportunities for monetization.

You can make money through display ads, affiliate marketing, Instagram partnerships with brands, and more.

With WordPress, you can add all the tools you need to grow your brand. You can connect your Instagram feed and other social media, Youtube videos, find fashion website themes, use advertising plugins, and more.

For details, see our tutorial on how to start a fashion blog and promote it the right way.

8. Start a Travel Website

Travel blog

Making a travel blog is another great website idea that is easy to implement and build upon.

You can be an experienced traveler, vlogger, or marketer promoting different tourist destinations. You can monetize using display ads, travel partnerships, earning perks, and more.

Influential travel bloggers are using their travel blogs to launch different products and making significant passive income.

For more on this, don’t forget to check out our article on how to make a travel website using WordPress.

9. Make a Food / Recipes Website

Food blog

Food and recipe websites are already a popular website idea with plenty of room for new websites.

You can easily start a blog or website, share recipes, discuss food, weight loss, health, or other related topics. Most recipe websites make money through ads, affiliate marketing, and by selling membership subscriptions.

WordPress comes with plugins that allow you to easily write recipes in SEO friendly format. For details, you can follow our tutorial on how to create a food website and make money online.

10. Start a Podcast Website

Podcast website

Podcasting is another popular website idea that you can launch. It is a fast-growing niche with tons of monetization options.

A podcast is an episodic series of audio files that users can subscribe to download and listen to.

Successful podcasters are making significant money online through sponsorships, advertisements, selling products, and more. It does require a little bit of hardware and some practice with recording and uploading files.

We have a comprehensive guide on starting a podcast website with step by step instructions.

We also have a list of the best podcast hosting platforms to help you succeed.

11. Start a Job Hunt Website

Job board

Another popular website idea is to create a job hunt website. It is easy to monetize, and you make money based on user-generated content.

Basically, a job board website allows companies to post job listings and facilitate job seekers by browsing and searching for jobs.

There are WordPress plugins that help you quickly create a job search engine. You can even accept online payments from employers to post listings.

For details, see our guide on how to create a job board in WordPress.

12. Make a Coupons Website

Coupons website

A coupons website helps customers find coupons and deals for their favorite products.

It connects businesses to the customers and provides them tools to locate deals and discounts. It is monetized by affiliate links, partnerships, and display ads.

You can totally automate your website and allow businesses to submit deals directly. This allows you to make money online with user-generated content.

For more details, see our guide on how to create a coupon site in WordPress.

13. Create an Online Marketplace

Marketplace website

Many successful marketers use ideas that involve user-generated content to make money. Creating an online marketplace website is one such website idea that you can easily replicate.

A marketplace website is where you provide an eCommerce platform for others to sell their products. You get a cut on each transaction made on your website while the sellers manage the shipping and fulfillment.

For more details, see our article on creating an online marketplace website with detailed instructions.

14. Start a Restaurant Website

Restaurant website

Making a restaurant website is an idea specific to people in the restaurant and food industry. Making a restaurant website allows you to accept table reservations and even accept online orders for food delivery.

With WordPress, you can use tools like WPForms to accept bookings and food delivery orders. It also gives you access to many professionally designed restaurant templates that you can customize to your own needs.

Making a restaurant website also helps you easily promote your business, reach new customers, and strengthen your brand image.

15. Build a Reviews Website

Reviews website

Most users look at online reviews before making a buying decision. This makes a reviews website a really lucrative website idea.

Your review website can be on any specific niche or topic you’re interested in, from digital cameras to video games or other products.

A reviews website could rely on both user-generated and original content. You can make money using display ads, affiliate marketing, sponsorships, and more.

We have an article on how to create a niche reviews website with step by step instructions.

16. Make a Photography Website

photography website

Another exciting website idea is to launch a photography website. This could be a blog about photography itself, or it could be a place to showcase and sell your own photos.

You can also create a marketplace like Shutterstock where users can sell or buy photographs, illustrations, and other graphic design items.

For more information, take a look at our article on how to make a photography website in WordPress.

17. Launch a Portfolio Website

Portfolio website

A great website idea is to make a portfolio website. If you are an artist, photographer, musician, or videographer, then a portfolio website helps you showcase your work and find new opportunities.

However, you don’t need to be an artist to make a portfolio website. The same idea can be used by any kind of professional like writers, web designers, developers, fashion models, and more.

You can use portfolio plugins to showcase your work or choose from these beautiful portfolio themes to get started.

18. Start an Online Food Delivery Website

Food delivery website

The online food delivery business is booming and it could be a profitable website idea with a little bit of investment.

You can find local restaurants and create a website that showcases these restaurants and allows customers to order food online. You can then pass the order to the restaurant and they deliver the food.

You can use WPForms to collect food delivery orders. Upon form submission, you can show users a page with estimated delivery time and a phone number to the restaurant.

19. Sell Handicrafts Online

Sell handicrafts online

Want to sell your homemade items on the internet? It is really easy to do and could be the beginning of a successful business idea.

You can start an online store using WooCommerce, which is super-easy to set up. Unlike other platforms, WooCommerce doesn’t take a cut out of each transaction you make which is really important for home-based business.

For details, see our guide on how to make an Etsy like store in WordPress.

20. Start a Pets Store / Community

Pet shop website

Making an online pets store is another easy to start website idea. It is such a massive industry that you can find many untapped niche ideas catering to specific customers.

You can sell anything on your pet store using WooCommerce. You can also use MemberPress to build a members-only community that generates even more revenue for your business.

21. Start a News Website

News website

If you are into current affairs and politics, then creating a news website could be the money making idea you are looking for.

You can start a news website and monetize it using display ads and by selling membership subscriptions. Many traditional newspapers are already putting their content behind paywalls and monetizing.

You can start small with few articles per week and then build upon that. You can even invite guest authors, start a podcast, and sell merchandise to make a sustainable business.

With local newspapers struggling, there’s a high demand for hyper-local niche news website, and we believe this will be a huge trend going into 2021 and beyond.

We hope this article helped you find the best website idea to launch in the new year. Once you have launched your website, you can see our tips on how to increase your website traffic, and our guide on the best WordPress plugins to grow your online business.

If you liked this article, then please subscribe to our YouTube Channel for WordPress video tutorials. You can also find us on Twitter and Facebook.


6 Best Drag and Drop WordPress Page Builders Compared (2022)

Looking for an easy way to build and customize your WordPress site? That’s where drag and drop page builder plugins come in handy.

WordPress page builders allow you to create, edit, and customize your website layout without writing any code.

In this article, we will compare some of the best drag and drop page builders for WordPress.

Best WordPress Drag and Drop Page Builders

Why Use a Drag and Drop Page Builder for WordPress?

When starting a blog, many beginners find it difficult to customize their WordPress page layouts.

While a lot of premium WordPress themes come with different page layouts, most of them are extremely hard to customize for anyone who does not know code (HTML / CSS).

This is why users often ask us questions like: “how can we make WordPress drag and drop?” or “is there an easy drag and drop page builder for WordPress?”

When we talk with people who switch from Weebly to WordPress or from Wix to WordPress, their most common response is: “I wish WordPress had a drag and drop website builder”.

Well, there are several great drag and drop page builder plugins available for WordPress. They allow you to create completely custom website designs in WordPress without writing a single line of code.

Since there are so many different WordPress page builder plugins in the market, we decided to compare and rank the top WordPress page builders, so you can choose the right solution for your need.

Our criteria for comparing these WordPress page builders are ease of use, flexibility, and design output.

Having said that, let’s take a look at the best page builders for WordPress in the market.

Video Tutorial

Subscribe to WPBeginner

If you’d prefer written instructions, just keep reading.

1. SeedProd

SeedProd WordPress Website Builder

SeedProd is a premium WordPress theme and page builder plugin. Unlike other page builders, it lets you create custom WordPress themes from scratch without writing any code.

You can choose from hundreds of beautiful pre-made layouts, or create a completely custom website template with an easy-to-use drag and drop visual builder.

There are ready-made templates for landing pages, sales pages, thank you pages, webinar registration pages, coming soon pages, maintenance mode pages, 404 pages, and more.

SeedProd Landing Pages

SeedProd is built with website speed in mind. It ensures that your pages are the fastest, so you can rank higher in SEO.

It comes with a smart design system, so you can save time by re-using elements instead of doing repetitive work. You can define color schemes, save font combinations, page templates, custom blocks, sections, and more.


SeedProd Custom Blocks

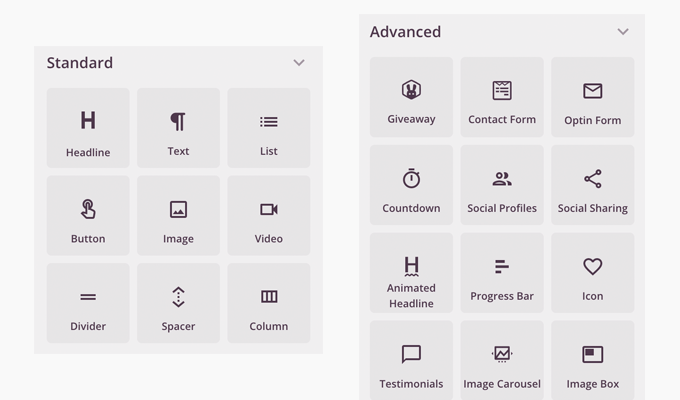
SeedProd has all the blocks and features that you’d expect from a powerful page builder such as optin forms, social profiles, countdown timers, contact forms, buttons, various content blocks, and more.

The best part is that some of these blocks even have pre-made templates, so you can speed up the design process by adapting your favorite block templates (1-click).

You can use their custom domain mapping feature to create micro-sites within WordPress. Agencies use this feature to manage multiple clients’ landing pages from a single WordPress installation.

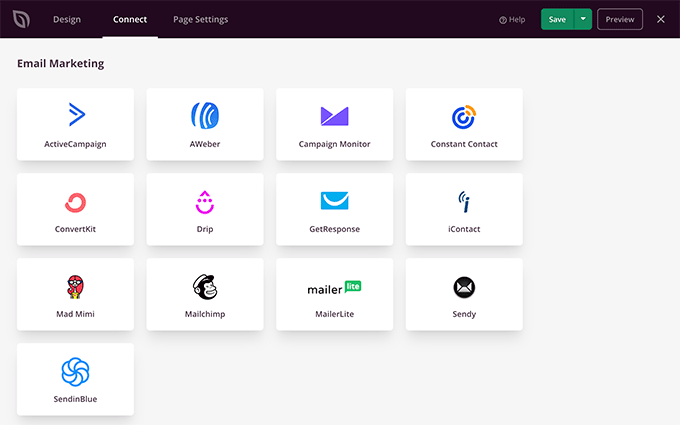
SeedProd works with all popular WordPress themes and plugins. It also has built-in subscriber management, and you can easily connect it with popular email marketing services such as MailChimp, ActiveCampaign, ConvertKit, and more.

SeedProd Email Marketing

Over 1 million users are using SeedProd to make better website layouts.

Pricing: Starting from $39.50 for a single site license.

Our Grade: A+

Review: SeedProd is the fastest theme and page builder plugin in the market. It is also the most affordable. Their large library of pre-built templates and pro blocks is a huge time saver. The ability to customize every little detail makes it the perfect solution for all WordPress users.

2. Beaver Builder

Beaver Builder

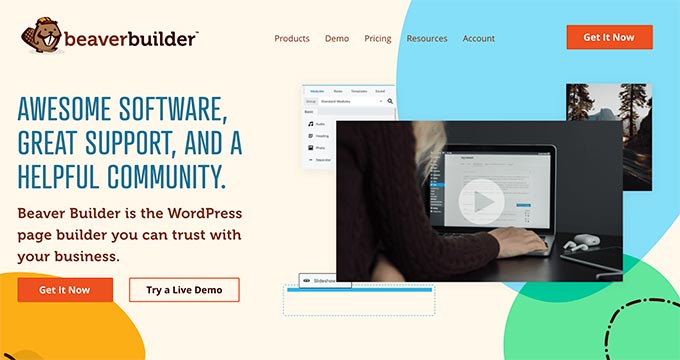
Beaver Builder is the most popular drag and drop page builder plugin for WordPress.

You can quickly familiarize yourself with their interface and get started with their built-in onboarding tour.

Beaver Builder comes with a live drag and drop interface. You get to see all your changes as you add them by dragging elements from the right sidebar and dropping them on your page. You can click on any element on a page to edit its properties.

There are modules that let you add almost everything you may want including sliders, carousel, backgrounds, content blocks, buttons, and more.

It also comes with over 30 finely designed templates for landing pages that make it super-easy and super-fast to create stunning website layouts.

We find Beaver Builder to be very beginner-friendly. Check out our tutorial on how to create custom WordPress layouts with Beaver Builder.

Wondering if it is compatible with the new WordPress version? Yes, it is.

Beaver Builder has been updated to work alongside the new WordPress Gutenberg editor.

Pricing: Starting from $99 for Unlimited Sites.

Our Grade: A+

Review: Beaver Builder is a popular page builder option in the market. It comes with pre-made templates to help you get started. A lot of web professionals use Beaver Builder to create their client sites and custom themes.

3. Divi

Divi

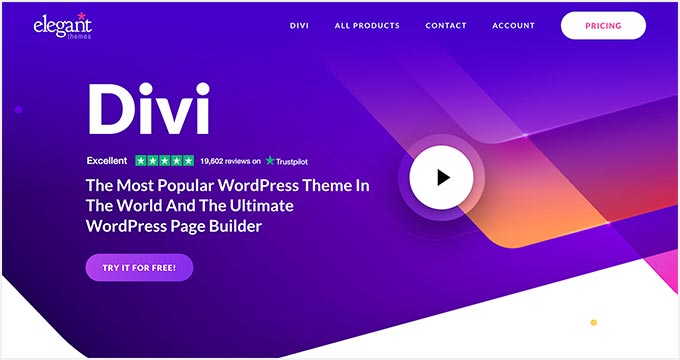
Divi is a professional drag and drop theme and WordPress page builder plugin. It is extremely easy to use and comes with hundreds of layout packs for different kinds of websites.

Similar to SeedProd and Beaver Builder, the Divi Builder comes with a visual drag and drop functionality, a true WYSIWYG (what you see is what you get) visual editor.

You can directly click on your page and start editing in real-time with a live preview of all changes. So you don’t need to save and click preview to see your new design.

Divi comes with dozens of content modules that you can drag and drop anywhere in your layout. It lets you arrange these modules in multiple section types and row types. And you can customize each element using its advanced design settings.

With Divi, you can create any type of custom page layout within a few minutes. You can then save these Divi layouts for future use on your site. You can also export a layout from one Divi installation into another.

The Divi Builder plugin is the backbone of the Divi theme, yet it works well with any other popular WordPress theme.

Best of all, Divi has very attractive pricing options. For a single price, you’ll get the Divi theme, the Divi page builder plugin, and all other Elegant Themes products (Extra, Bloom, etc).

This means you can use the Divi theme or install the Divi Builder plugin on any other theme.

Pricing: Starting from $89 per year (a lifetime access plan is also available)

Our Grade: A

Review: Divi is a great SeedProd builder alternative. It has a powerful page builder with limitless design possibilities. Their large number of content modules allow you to create literally any type of website that you really want. Their lifetime plan also makes it one of the best deals in the market.

4. Elementor Pro

Elementor Pro

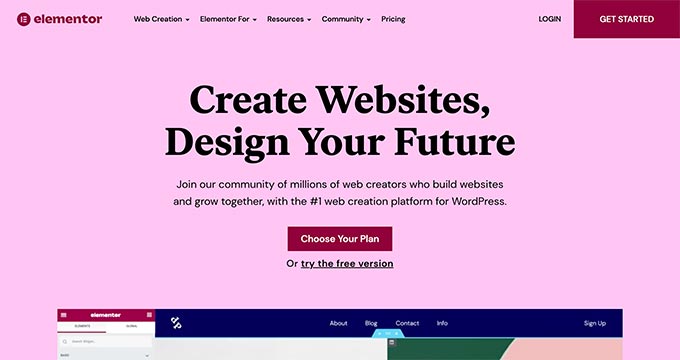
Elementor Pro is a powerful drag and drop WordPress page builder plugin.

It is a live page builder plugin which means you get to see your changes live as you edit them with Elementor.

Start by creating sections and select the number of columns for each section. You can then drag and drop widgets from the left panel to your section.

Elementor comes with tons of widgets including the most commonly used website elements. From basic image and text widgets to advanced accordions, sliders, testimonials, icons, social media, tabs, etc.

Each widget is independent and comes with its own settings. Elementor will also let you add widgets created by other WordPress plugins.

Don’t want to build your own layout?

Elementor comes with many ready-to-use templates that you can easily insert into your pages. You can simply point and click to edit any item on the page, replace the content, and you’re done.

Pricing: Starting from $49 for a single site license.

Our Grade: A

Review: Elementor is a popular page builder plugin for WordPress. It is easy to use, has a large extensions ecosystem, and comes with tons of modules/templates that you can use to build a custom website. The code output is not as efficient, and users often report slower page speed.

5. Visual Composer Website Builder

Visual Composer

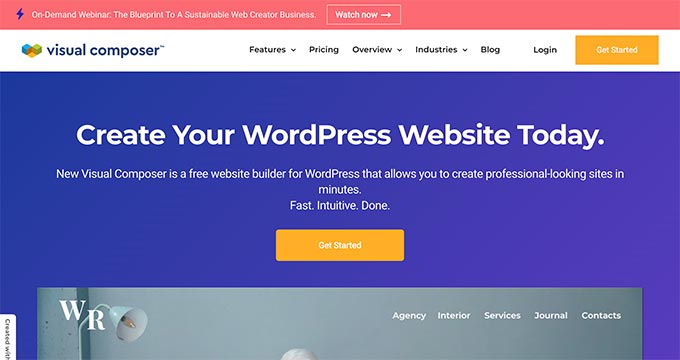
Visual Composer Website Builder is a user-friendly WordPress website editor that helps you create custom website layouts, fast.

It comes with a simple drag and drop builder, out of box content elements, professional templates, and a host of powerful features to make a website.

Similar to SeedProd and Beaver Builder, it also provides real frontend editing experience for designing a website. But there’s a lot more you can do with this plugin. With the exception of SeedProd, Visual Composer is the only other plugin that allows you to edit all aspects of your landing page such as logo, menus, headers, footers, sidebars, etc.

That’s why the team decides to call it a website builder, instead of just a page builder.

The plugin features powerful design options to customize the appearance of any element on your page. You have easy options to add stylish backgrounds including parallax, gradient, slideshow, carousel, zoom in/out, video, etc. It also comes with flexible rows and columns for creating grid layouts on your site.

Visual Composer works well with all WordPress themes. This allows you to switch your themes without losing custom layouts that you created with Visual Composer.

It also includes support for the new Gutenberg editor, Google Fonts, and Yoast SEO.

Visual Composer is designed for professionals, and it is evident by their attention to detail such as remembering your color choices, which allows you to easily use the same color palette for consistency throughout your design.

Pricing: $59 For One Site License

Our Grade: A-

Review: Visual Composer is a great plugin for beginners to start a website. It provides powerful features for website making in a simple manner. Website editing is made super simple with the real frontend drag and drop editor. The interface is a bit different than typical WordPress plugins, so it can feel alienating to new users.

6. Themify Builder

Themify Builder

Themify is a popular WordPress theme shop that offers a built-in Themify Builder with all of their WordPress themes. For other non-Themify WordPress themes, you can get the Themify Page Builder plugin.

This simple and highly intuitive page builder comes with several ready-to-use modules that you can add to your pages or posts. Many of these modules usually require you to install separate WordPress plugins.

The plugin includes 40+ pre-designed layouts for different industries like gym, restaurant, portfolio, music, photography as well as online shops.

You can import a layout with one click, change its content, and build an awesome landing page within minutes.

Themify Builder allows you to edit your pages from the admin area as well as from your live site. With live editing, you get to see exactly how your changes will appear on the site.

Apart from that, Themify Builder comes with ready-to-use layouts that you can quickly apply to your page.

Pricing: $39 For the Builder Addon Bundle (The core plugin is free)

Our Grade: B

Review: Themify Builder is a reliable page builder plugin for WordPress. While the builder comes with promising features, there is a learning curve that can leave a new user frustrated.

Final Thoughts: Best WordPress Page Builder Plugin

As we compared different drag and drop WordPress page builders, one thing became very clear. SeedProd, Beaver Builder, and Divi are clearly the top 3 choices.

Visual Composer and Elementor Pro are other great alternatives that offer a complete drag & drop WordPress page builder.

If you don’t mind spending a little bit of money to get the best solution in the market along with guaranteed support, then go for any of these options, and you won’t regret it.

Do I still need a Page Builder if I am using the new WordPress Block Editor?

Recently we’re getting a lot of users asking us this question.

The WordPress block editor is also known as Gutenberg was officially launched as the new default WordPress editor. The new editor uses blocks which are content elements for creating pages and posts.

Superficially, the block editor looks similar to some of the WordPress page builders above.

WordPress Block Editor

Hence there’re hot discussions going on in WordPress about Gutenberg and page builders.

Is Gutenberg a page builder? Does the Gutenberg block editor replace the WordPress page builders? And, do I still need a page builder if I am using the new WordPress block editor?

Well, the answer to the first two questions is ‘No, not quite yet.’

And, Yes, you will need a page builder if you want an easy way to create completely custom WordPress designs.

Gutenberg in its current form is no match to the powerful features these “true” WordPress page builder plugins offer.

Having that said, you can use a plugin like CSS Hero with Gutenberg and probably get away without using a true page builder, but it entirely depends on your needs.

A lot of our readers love using CSS Hero for quick and easy website customization. Read our full CSS Hero review to see if it is a suitable solution for your needs.

We hope this article helped you find the best WordPress drag and drop page builder plugins for your site.

You may also want to see our following guides:

If you liked this article, then please subscribe to our YouTube Channel for WordPress video tutorials. You can also find us on Twitter and Facebook.