How to Properly Add Google AdSense to Your WordPress Site

Do you want to add Google AdSense to your WordPress website?

Google AdSense is one of the easiest ways to start making money online with your website. It allows you to automatically sell your website’s ad space to advertisers and get paid.

In this article, we will show you how to add Google AdSense in WordPress, along with some best practices and tips to increase your earnings.

How to Add Google AdSense to WordPress site

What is Google AdSense?

Google AdSense is an advertising network run by Google that allows bloggers and website owners an opportunity to earn money by showing text, images, videos, and other interactive advertisements on their websites. These ads are targeted by site content and audience, so they’re highly relevant.

Google AdSense is hassle-free because you don’t have to deal with advertisers or worry about collecting money. Google administers and maintains relationships with advertisers. They collect the payment, take their management fee, and send the rest of the money to you.

AdSense offers cost-per-click ads (CPC), which means that you earn money every time a user clicks on the ad on your website. The amount received per click varies based on a variety of factors.

Getting Started with AdSense

The first thing you need to do is sign up for a Google AdSense account. If you have a Gmail account, then you can use your existing account to sign up.

Once you’ve submitted your application, you will need to wait for the Google AdSense team to review it. This may take a few hours to a few weeks for some publishers.

Once it is approved, then you can log in to your AdSense account and get your ad code. This is the code that you need to place on your WordPress website to display ads.

With Google AdSense auto ads, you can paste just one piece of code and then Google automatically decides when, where, and how many ads to show on each page.

However, many publishers use the manual method to individually place ads on their websites.

We’ll show you both methods. We recommend starting with the manual ad placement first. Once you have started earning, then you can experiment with auto-ads to compare them yourself.

Video Tutorial

Subscribe to WPBeginner

If you’d prefer written instructions, just keep reading.

1. Manually Place Google AdSense Ad Code in WordPress

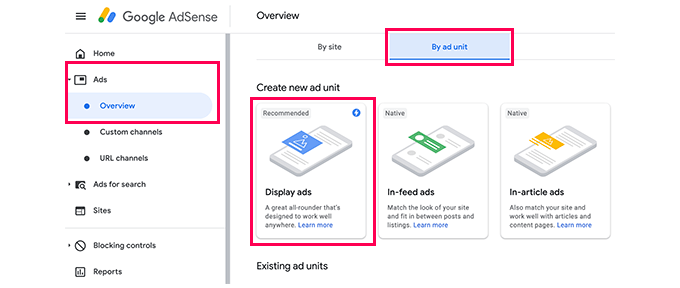
You’ll start by clicking on the Ads menu in the left column and then switching to the ‘By ad unit’ tab. From here, you need to click on ‘Create New Ad.’

You will be asked to choose an ad type. You can select from Display ads, In-feed ads, and In-article ads.

If you are unsure, then start with the display ads.

Choose your unit

Next, you need to provide a name for this ad unit and select the ad size and type.

Enter details and select size

The name of the Ad is only used for internal purposes so you can name it anything like “SiteName Sidebar.”

The next option is choosing the Ad Size. While Google offers a wide variety of ad sizes, there are certain sizes that are listed under recommended because those are the most popular among advertisers.

You can also choose whether you want your ad to be responsive or fixed. We recommend choosing responsive ads as they work well on all devices and screen sizes.

Next, click on the Create button to continue.

AdSense will now generate the ad code for you. It contains the unique ad unit ID and your publisher ID.

Copy the code

Simply copy your ad code and paste it into a plain text editor like Notepad or TextEdit. You will need it in the next step.

Adding Google AdSense in WordPress

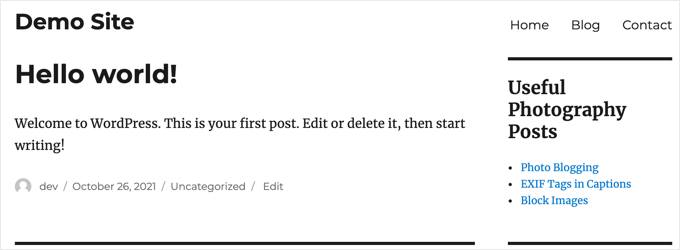
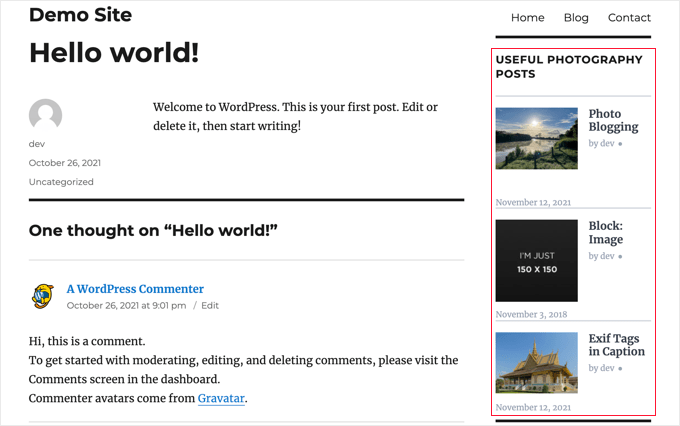
Next, you need to determine where you want to show the ad on your website. Ads are most commonly displayed in the sidebar. You can add Google Adsense to your sidebar by using WordPress widgets.

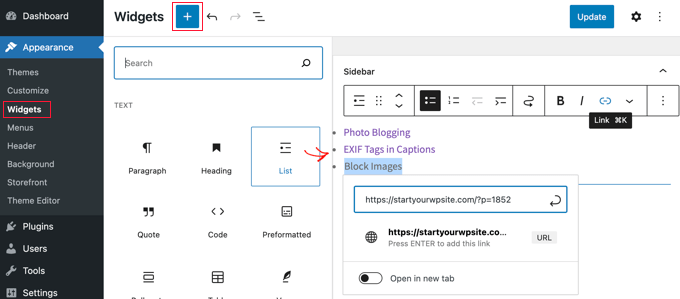
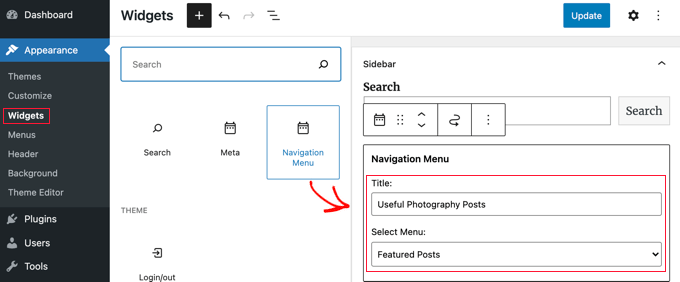
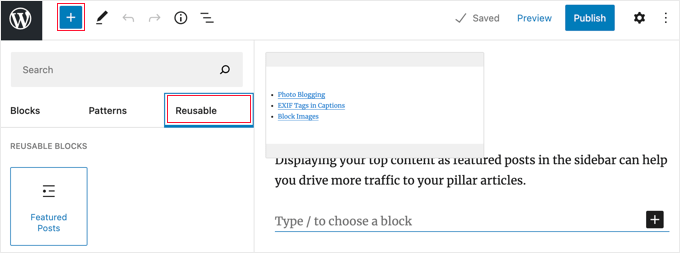
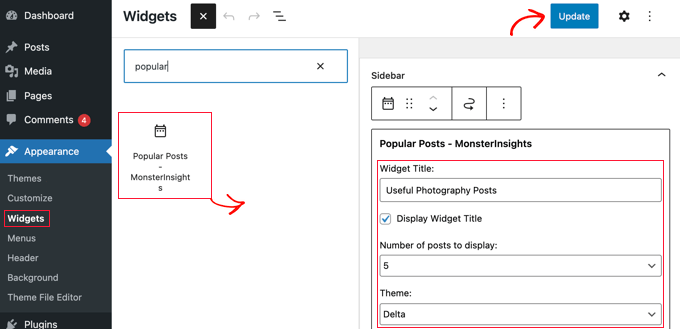
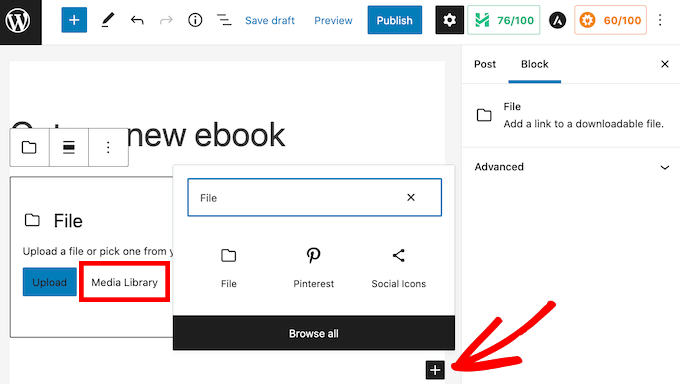
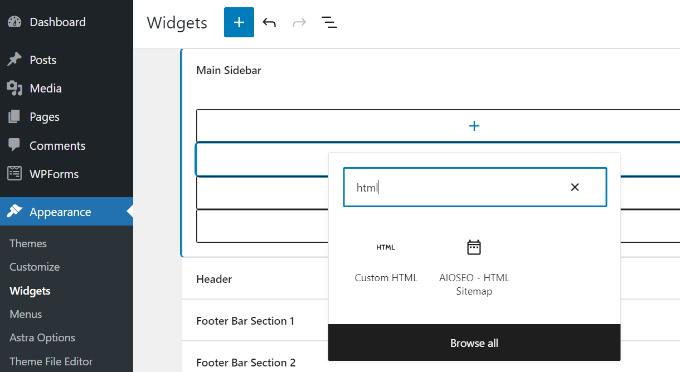
Simply go to the Appearance » Widgets page in your WordPress admin area. Next, click the ‘+’ button to add a ‘Custom HTML’ widget block to the appropriate widget area.

Add custom HTML widget block

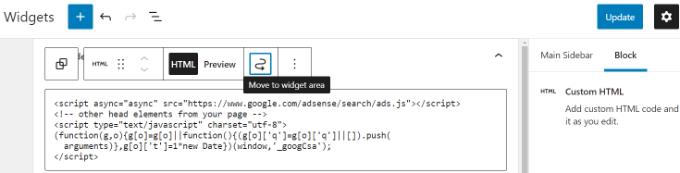
Next, you’ll need to enter the Google AdSense code in the Custom HTML widget block.

After that, don’t forget to click the ‘Update’ button.

Enter code and update widgets page

For better placement control and tracking, we recommend checking out the AdSanity WordPress plugin. You can see our guide on the best ad management WordPress solutions for more details.

2. Add Auto-Ads AdSense Code in WordPress

Adding individual ads to different areas of your website takes a lot of time. Most beginners struggle to find the best locations to display ads on their sites.

To solve this, Google introduced auto-ads. This allows you to simply add one code snippet to your site and let Google AdSense figure out the highest paying location, ad size, and type.

The disadvantage of this method is that you have less control over ad placement on your website.

If you want to use the auto-ads feature, then this is how you’ll add Google AdSense to your website.

First, log in to your Google AdSense account and click on the Ads tab. Next, you need to click on the Get Code button to generate the auto-ads code.

Get code for auto placement

AdSense will now generate a code snippet with your publisher ID and display it. You can now copy and paste this code into a text editor.

Copy and paste the code

Adding AdSense Auto-Ads Code in WordPress

The auto-ads code uses a single code snippet to generate ads everywhere on your WordPress blog. This means you need to add the code to all the pages where you want to display the ad.

One way to do this is by adding the code in your WordPress theme’s header.php file. However, the disadvantage of this method is that your ad code will disappear if you update or change your theme.

The best way to add any site-wide code to your website is by using a plugin like WPCode.

First, you need to install and activate the WPCode free plugin. For more details, see our step-by-step guide on how to install a WordPress plugin.

Upon activation, go to the Code Snippets » Header & Footer page. From here, you need to paste your Google AdSense code in the header section.

Paste Google Adsense code in the header using WPCode

Don’t forget to click on the ‘Save Changes’ button to store your changes.

The plugin will now add the ad code on all pages of your website. It may take Google AdSense some time to start showing ads.

AdSense Best Practices and Frequently Asked Questions

Over the years, we’ve answered several AdSense-related questions. Having used AdSense on several of our sites in the past, we’ve learned a whole lot about optimizing. Below are some AdSense best practices and frequently asked questions.

What’s the best AdSense Ad Size?

Although ad placement is key, we’ve found that the best sizes are 336×280 and 300×250. These ads tend to fit on most screen sizes and have the best pay rate as well.

What’s the Best AdSense Placement?

This entirely depends on your layout. The goal is to get more impressions and clicks, so you want to place your ads in a more prominent spot. We have found that ads within post content towards the top of the screen tend to get the most clicks.

Several users have asked us about adding AdSense in a floating widget because it will be very prominent. We strongly recommend against that because it is not allowed by Google Terms of Service. If you violate their TOS, then you can get banned from the program.

Can I click on my own Google AdSense Ads?

Often beginners are tempted to click on their own ads or ask their family members to click on their ads. Please don’t do that. Google’s algorithm is very smart and knows when you’re clicking on your own ad. This can get you banned from the program.

What is Page RPM in Google AdSense?

RPM stands for Revenue per Mille, meaning revenue per 1000 impressions. This is determined by multiplying the total number of clicks and cost per click and then dividing that by the total number of pageviews.

Can I use my Blogger or YouTube AdSense account with WordPress?

Yes, you can. If you started using AdSense on one of Google’s hosted platforms like Blogger or YouTube, then you can change your AdSense account type and use it with WordPress. You’ll need to provide Google AdSense with the URL of the site you want to monetize by filling out an application form.

Simply log in to your AdSense account and then under ‘My Ads’ click on the ‘Other Products’ option. Next, you need to click ‘Upgrade now’ and complete the application form.

What is CTR in Google AdSense?

CTR or click-through rates differ vastly for different kinds of websites. Your ad clicks depend on a lot of factors like your website’s topics, your audience type, ad placement on your site, and more. The ideal CTR for Google AdSense is really hard to define because you don’t have access to the click rates of other websites like your own.

However, Google AdSense has built-in tools that will start showing you messages if your site is not getting a good CTR. You can follow the optimization guides shown inside the Google AdSense dashboard to improve your ad revenue.

When and how does Google AdSense pay publishers?

Each month, Google AdSense calculates your previous month’s earnings and shows them on your ‘Transactions’ page. If your earnings match the required threshold, then your payment is processed and released by the 21st of that month.

There are multiple payment methods available, including direct electronic transfer, wire transfer, check, Western Union, and more.

Why did Google AdSense reject my application?

Google Adsense may reject your application if your website is brand-new or otherwise doesn’t meet the AdSense program policies or their terms and conditions.

If they do, you could always consider using another ad management plugin or try another way to make money with your WordPress site.

What are the requirements to get Google AdSense application approved?

Here are the minimum requirements to get your Google AdSense account application approved.

  • Your website and all its content must comply with AdSense program policies and terms and conditions.
  • Your website should be at least 6 months old.
  • You, the applicant, must be over 18 years old.

Note: Even if your application meets all the requirements, Google AdSense still reserves the right to decline your application.

Can I add Google AdSense in my WordPress.com blog?

WordPress.com does not allow you to add Google AdSense to your website unless you upgrade to the Business plan. For more on this topic, please see our guide on the difference between WordPress.com vs WordPress.org.

What is the difference between Google AdSense vs Google AdWords?

Google AdWords allows you to advertise on other websites, including those participating in the Google AdSense program.

Google AdSense allows you to make money from your website by showing ads on your website.

How do I get rid of Adsense Ads?

If Google Adsense is displaying too many ads or you’re seeing ads in random places on your site, you’re probably using Google Adsense Auto ads.

To turn off Auto ads, sign in to your Adsense account and go to Ads » Overview. Next, click on the ‘Edit’ icon next to your website. You can disable the Auto ads options in ‘Site Settings’ to completely remove Auto ads on your site. Or, you can select the ‘Page Exclusions’ option to disable Auto ads from specific pages.

We hope this article helped you add Google AdSense to your WordPress site. You may also want to check out our guide on how to increase your blog traffic, and the best email marketing services to grow your subscribers.

If you liked this article, then please subscribe to our YouTube Channel for WordPress video tutorials. You can also find us on Twitter and Facebook.

How to Add Featured Posts in WordPress Sidebar (4 Methods)

Do you want to add a featured posts section in the sidebar of your WordPress website?

Displaying your top content as featured posts in the sidebar can help you drive more traffic to your pillar articles.

In this article, we’ll show you how to easily display featured posts in the WordPress sidebar using multiple methods.

How to Add Featured Posts in WordPress Sidebar (4 Methods)

Why Add Featured Posts in WordPress Sidebar?

Sidebars are columns placed on the left or right of the content area on your WordPress website. Most website owners use this space by adding an email newsletter form, social media buttons, banner ads, or other kinds of content.

Another way you can use the sidebar is by displaying your top articles as featured posts. This helps you get more traffic to those articles, and helps your users to be able to discover your best content without looking for it.

Here is how we feature our top articles on WPBeginner. This sidebar widget appears on all posts on our website.

Featured Posts WPBeginner

That being said, let’s take a look at how to add featured posts in the WordPress sidebar to boost your pageviews and user engagement. We’ll cover four methods, and you can use the list below to quickly navigate through the article.

This method is straightforward and does not require you to install any plugin on your website.

Simply go to Appearance » Widgets page and add a List widget to your WordPress sidebar using drag and drop.

Featuring Posts in WordPress Sidebar Using a List Widget

This widget comes with a visual editor equipped with a few formatting buttons at the top. You can simply add titles of the posts you want to feature as a bulleted list.

To add your featured posts as list items, select the post title and then click on the link button to add a link to the blog post.

You can add a heading to the featured list by adding a Heading widget just above the list.

Group 2 Widgets Together

You can make the Heading and List widgets act as a single block by creating a group. Simply select both widgets and then click the Group icon. After that, you should select ‘Group’ from the pop up menu.

Don’t forget to click on the ‘Update’ button to store your changes.

You can now visit your website to see your featured posts in action. This is how it looked on our demo site.

Featured Posts in WordPress Sidebar Paragraph Widget

Method 2. Feature Posts in WordPress Sidebar Using Menus

This method is less direct but lets you manage your featured posts more effectively.

Instead of adding the featured post list in a list widget, we will create a navigation menu and then display it in the sidebar.

The advantage of this method is that you can easily add new posts without editing the widget, and you can reorganize the list with a drag & drop interface. You’ll also be able to use the menu in multiple places on your website without having to create a new list each time.

Creating a Featured Posts Menu

First, you need to visit the Appearance » Menus page and click the ‘create a new menu’ link.

Create a New Custom Menu in WordPress

Next, you need to enter a name for your menu that helps you easily identify it whenever you need to add it somewhere.

After you’ve added a name, click on the ‘Create Menu’ button to continue.

Enter Your New Menu Name

WordPress will now create a new blank menu for you.

Now, you need to click on the ‘Posts’ tab from the left column to expand it. From here you need to select the posts you want to feature. You can find them under Recent, All, or use the search option to locate and select them.

Select Posts You Want to Feature

After selecting the posts you want to add, click on the ‘Add to Menu’ button.

Your posts will now appear in the right column and you can edit each one of their titles by clicking on it. You can also rearrange them by simply dragging them up or down.

Save Your Menu

Once you are satisfied, click on the ‘Save Menu’ button to store your changes.

Your menu is now ready to be used.

Adding the Featured Posts Menu to Sidebar

Simply go to the Appearance » Widgets page and add the ‘Navigation Menu’ widget to your sidebar using drag and drop.

Add Navigation Menu Widget to Your Sidebar

Next, you need to provide a title for your sidebar menu widget and then select the featured posts menu you created earlier from the dropdown menu.

Don’t forget to click on the ‘Update’ button to store your widget settings. You can now visit your website to see your featured posts list in action.

Featured Posts Displayed Using Navigation Menu Widget

Alternatively, you may want to display your feature posts inside a WordPress post or page. This is a good option if you’re using the page editor to create a custom homepage layout, or your theme may not have a sidebar.

This method is similar to Method 1, but allows you to feature posts in your WordPress posts and pages rather than the sidebar.

Simply edit a WordPress post or page where you want to showcase your featured posts. On the post edit screen, you should click on the add new block button (+) at the top and then add the List block to your content area.

Add List Block

Now you need to add the title of each blog post you want to feature as an item on the list. Then select the text and click on the link button in the toolbar to create a link to the article.

Once you are done, you can save your changes and update or publish the post.

How to Make the Feature Posts Block Reuseable

One great feature of the block editor is that you can save a block as a ‘reusable block’ and then add the same block in any posts or pages you want.

To make your feature posts block reusable, simply click on the three-dot menu icon in the block toolbar and select ‘Add to reusable blocks’.

Create Reusable Block

Next, you’ll be asked to provide a name for your reusable block. Give it a name that helps you easily identify it later.

Name Your Reusable Block

Click on the Save button to save your reusable block.

Now, you can easily add the featured posts block whenever you are editing a post or page. Simply click on the add new block button and look for your reusable block by typing its name.

Adding Reusable Block

You can also edit reusable blocks and it will automatically get updated everywhere. For more details, see our article on how to add reusable blocks in WordPress.

A simple plain list of links may often go unnoticed by your users. Using a plugin to display thumbnails with your featured posts will help users notice them more easily.

First, you need to install and activate the MonsterInsights plugin. For more details, see our step by step guide on how to install a WordPress plugin.

You’ll need a MonsterInsights Plus account or higher to display featured posts and access advanced tracking features. There is also a MonsterInsights Lite version that lets you get started with analytics on your site.

Upon activation, you’ll be taken to the MonsterInsights welcome screen inside your WordPress dashboard. Go ahead and click the ‘Launch the Wizard’ button to configure the plugin and connect Google Analytics with WordPress.

Launch setup wizard

You can follow our step by step guide on how to add Google Analytics to WordPress.

Once the plugin is set up, you’ll need to head over to Insights » Popular Posts in your WordPress admin area. Here you can select a theme for your popular posts widget.

You should start by clicking on the ‘Popular Posts Widget’ tab at the top of the page. However, if you want to display the list of featured posts in a post or page, then you should choose the ‘Inline Popular Posts’ tab instead.

Next, you should select a theme by clicking it.

Choose a Theme for the Popular Posts Widget

You will immediately see a preview of that theme in the Theme Preview area underneath. You will need to click the Narrow option to view the list as a widget.

Not all themes display thumbnails with the post title, so make sure you choose one that does. You will have to select the theme again when adding the widget to your WordPress sidebar, so make a note of it.

MonsterInsights Popular Posts Theme Preview

You can now scroll down to the Customize Design section.

Here you can adjust the color, size, and background of the title, author, and date. If you are placing the list in a post or page, then you can also choose the number of columns that will be used.

Customize the Design of the Popular Posts List

The Post Count setting lets you choose how many posts to display in the widget. The fewest posts you can display is 2 and the most is 10.

You can also choose which information will be displayed with the post title and thumbnail. By default, the author and date of the post will also be shown, but you can turn these settings off using the toggle buttons.

Customize the Design of the Popular Posts List

Next, you’ll need to scroll down to the Behavior section of the settings.

The Widget Styling option allows advanced users to style the featured post list using custom CSS code. For this tutorial, we’ll stay with the default styles.

Customize the Behavior of the Popular Posts List

You should sort the list using the Curated option. This allows you to select the posts that will be featured. Alternatively, you can have popular posts chosen automatically by clicking the Comments or SharedCount options instead.

To add a post to the list, simply start typing its title. A list of matching posts will be displayed and you can click on the right one.

Customize the Behavior of the Popular Posts List

Make sure to include at least the same number of posts as the Post Count setting above. If you include more posts, then the widget will randomly rotate between them.

The Automated + Curated setting will automatically include your most popular five posts in the rotation. If you’d like that, just toggle the setting on.

How to Easily Add Custom CSS to Your WordPress Site

The Widget Title allows you to display a title at the top of the widget. Feel free to add a title here, but you’ll have to type it again when you add the widget to your sidebar.

There are plenty of other settings for the MonsterInsights Popular Posts widget. For this tutorial we’ll go with the default settings for the remaining options.

When you’ve finished, you’ll need to scroll back to the top of the page and click the ‘Save Settings’ button to make the new widget available on your website.

Click the Save Changes Button to Store Your New Widget

Now you need to navigate to Appearance » Widgets and add the ‘Popular Posts – MonsterInsights’ widget to your sidebar using drag and drop.

Add the Popular Posts Widget to Your Sidebar

You will need to enter a title for the widget, select the number of posts to display, and choose the same theme as earlier in the tutorial. When you’ve finished, don’t forget to click the ‘Update’ button to store your widget settings.

Feel free to visit your website to see your featured posts with thumbnails. This is how it looked on our demo website.

Preview of Featured Posts with Thumbnails

We hope this article helped you learn how to easily feature posts in the WordPress sidebar. You may also want to see our guide on the best email marketing services and best WordPress SEO plugins to grow your website traffic.

If you liked this article, then please subscribe to our YouTube Channel for WordPress video tutorials. You can also find us on Twitter and Facebook.

How to Make Google Fonts Privacy Friendly (3 Ways)

Are you concerned about the privacy issues and legal risks of using Google Fonts on your WordPress site?

Google Fonts have been found to breach the EU’s privacy regulations. That means if you have website visitors from Europe, then you may be at risk of paying legal damages.

In this article, we’ll show you how to make Google Fonts privacy friendly in WordPress.

Why Are Google Fonts Not Privacy Friendly?

Your WordPress website’s typography plays an important role in your design and brand identity. That’s why many website owners customize their typography by using Google Fonts.

However, when someone visits a website that uses Google Fonts, their IP address is logged by Google when the fonts are loaded. This is done without their permission and the European Union considers it a breach of privacy regulations.

This means that websites using Google Fonts are no longer GDPR compliant. That’s an important legal consideration if you have website visitors from the European Union because it may make you liable for damages (of course you should consider your legal advisors before taking any action).

With that being said, let’s take a look at how to make Google Fonts privacy friendly. We’ll cover three methods, and you can use the list below to jump to the one you wish to use.

Method 1: Host Google Fonts Locally in WordPress

One way to make Google Fonts privacy friendly is to host them locally in WordPress. Luckily, that’s easy to do by using a plugin.

The first thing you need to do is install and activate the OMGF (Optimize My Google Fonts) plugin. For more details, see our step-by-step guide on how to install a WordPress plugin.

Upon activation, you need to visit Settings » Optimize Google Fonts to configure the plugin. You will see a statement that the default settings will automatically replace your Google Fonts with locally hosted copies.

All you need to do is scroll down the page and make sure that the ‘Font-Display Option’ has the default setting of ‘Swap (recommended)’ selected.

After that, simply click the ‘Save & Optimize’ button at the bottom of the page.

You’ll see a message at the top of the screen that says ‘Optimization completed successfully.’ Your Google Fonts are now hosted locally.

To learn more, see our guide on how to host local fonts in WordPress, including how to do this manually without a plugin.

Method 2: Replace Google Fonts With Bunny Fonts

Bunny Fonts is an alternative to Google Fonts that puts privacy first. Their zero tracking and no-logging policies help you stay fully GDPR compliant. The Bunny Fonts API is fully compatible with the Google Fonts API, and this makes switching simple.

All you need to do is install and activate the Replace Google Fonts with Bunny Fonts plugin. For more details, see our step-by-step guide on how to install a WordPress plugin.

There will be no configuration needed. Once you’ve activated Bunny Fonts, they will immediately replace Google Fonts on your WordPress blog, shop, and every other part of your site.

Method 3: Disable Google Fonts in WordPress

Another way of avoiding the privacy issues of using Google Fonts is to disable them altogether, and simply use the system fonts installed on your users’ computers. We did this when we redesigned the WPBeginner website, and it improved our page load times.

Simply install and activate the Disable and Remove Google Fonts plugin. For more details, see our step-by-step guide on how to install a WordPress plugin.

Upon activation, the plugin will automatically disable all Google Fonts used by your theme and plugins. It doesn’t need to be configured.

Now WordPress will automatically use a default font in place of any Google Fonts that were being used. If you would like to choose different fonts, then see our guide on how to change fonts in your WordPress theme.

You can learn more in our guide on how to disable Google Fonts on your WordPress website.

We hope this tutorial helped you learn how to make Google Fonts privacy friendly. You may also want to learn how to get a free email domain, or check out our list of ways to make money online blogging with WordPress.

If you liked this article, then please subscribe to our YouTube Channel for WordPress video tutorials. You can also find us on Twitter and Facebook.

The post How to Make Google Fonts Privacy Friendly (3 Ways) first appeared on WPBeginner.

How to Add Ebook Downloads in WordPress

Do you want to add ebook downloads to your WordPress site?

WordPress makes it easy for you to upload your ebook files in PDF format and make them available for download. You can also sell ebooks or use them to get more email subscribers.

In this article, we will show you how to add ebook downloads in WordPress as well as how to make the most out of your ebooks.

How to add ebook downloads in WordPress

We’ll cover a few different methods, so simply click the links below to jump to the section you need:

Method 1. Direct Ebook Downloads in WordPress Posts

With this method, you can offer your ebook as a free download using the WordPress File block. This block can even display your ebook’s content directly in the WordPress post or page

First you need to edit the post or page where you want to add your ebook download. You can then find the spot where you want to display your ebook, and click on the + icon to add a new block.

In the popup that appears, type File to find the right block.

add file block and click on media library

Once you click on the File block, it will add the block to your page.

In the File block, click on the Media Library button, and a popup will appear.

upload file to the media library

You can now select your ebook file, or drag and drop the file to upload it.

By default, the File block displays your ebook’s contents in a small PDF viewer.

It also has controls that visitors can use to scroll through your ebook, download the file, or even print your ebook.

WordPress' embedded PDF viewer

Sometimes, you may not want to display a preview. For example, your ebook may span lots of pages or have images that you want visitors to see fullscreen. 

If you don’t want to include a preview, then you can find the PDF settings in the right sidebar of the content editor. You can then click to expand this section, and turn off the ‘Show inline embed’ slider. 

Customizing the WordPress File block

WordPress will now remove the preview, and display only a Download button and a link. 

Visitors can download this file to their local computer by clicking on the blue Download button, or open this ebook in a new tab, by clicking on the link.

If you prefer, you can remove the Download button. To remove it, first click on the ‘Download button settings’ section in the WordPress sidebar.

You can then click on the ‘Show download button’ slider to turn this setting off.

The 'Download button settings'

Without the download button, visitors can still download the file manually, but they would have to launch your ebook in a new tab first to find the download option.

As you’re making changes to your File block, you can see how it will appear to visitors by clicking on the Preview button at the top of the screen. 

Once you’re happy with your File block, you may want to add more blocks. For example, you might write some supporting text or add a call-to-action button to encourage visitors to download your ebook.

How to create an ebook marketing page

When you’re ready, don’t forget to make your changes live by clicking on the Update or Publish button at the top of the screen. 

That’s it! You have now successfully added your ebook download into a WordPress post. You can now visit your website to see it in action. 

Note: Want your visitors to be able to search for your ebook’s contents on your website? WordPress doesn’t do this by default, so we wrote a guide on how to add PDF indexing and search in WordPress.

Method 2. Use Ebook Downloads to Get More Subscribers

Uploading your ebook using the File block is an easy way to offer great content for free.

However, if you’re using your ebook to grow your email list or capture leads, then you’ll want to make sure your visitors can’t access the ebook until they share their email address.

To set that up, you’ll need OptinMonster. It’s the best lead generation plugin for WordPress.

Using this plugin, you can create high-converting opt in forms without hiring a developer. We use it on WPBeginner and have increased our conversions by over 600% with this plugin alone.

OptinMonster also comes with lots of ready-made templates that you can use to create high-converting popups.

OptinMonster's template library

You can use these popups to ask visitors to perform an action before sending them to the ebook download. This marketing technique is sometimes referred to as offering lead magnets.

Basically, you offer free bonus content to your visitors in return for a small action like signing up to your mailing list.

An ebook popup, created using OptinMonster

It’s a win win for both parties. You get a new lead or subscriber, and your users get a free ebook.

For detailed instructions, see our step by step guide on how to add content upgrades in WordPress.

Method 3. Sell Ebook Downloads in WordPress Using Easy Digital Downloads

There are lots of different ways to earn money from your WordPress website. One option is to sell digital products, such as ebooks.

To sell ebooks, you’ll need a plugin.

We recommend Easy Digital Downloads, one of the best eCommerce WordPress plugins. This beginner friendly plugin makes it super easy to sell any type of digital product including ebooks.

First, you’ll need to install and activate the Easy Digital Downloads plugin. You can follow our tutorial on how to install a WordPress plugin.

Upon activation, the first task is adding your ebook as a new product. To get started, head over to Downloads » Add New

On this page, type a name for your ebook into the ‘Enter download name here’ field. This will usually be the book’s title, but it can be anything that you want. 

Adding a download to Easy Digital Downloads

Next, type a description for your ebook into the main section of the post editor. This could be a sales pitch that you’ve written to promote your book, or you might use the book’s blurb or summary.

To help visitors discover your ebook, you may want to create some categories and tags. You can add this information in the Download Categories and Download Tags sections.

Creating categories and drafts in Easy Digital Downloads

After that, scroll down to the Download Prices section.

Here you can set a price for your ebook.

How to add ebooks in WordPress

Easy Digital Downloads also supports variable pricing. You might use variable pricing to sell other products alongside your ebook. For example, you could give customers the option to save money by preordering your next ebook at the same time.

If you want to offer variable pricing, then select the ‘Enable variable pricing’ checkbox. This adds a new section where you can set your different prices.

Creating variable pricing for an ebook in WordPress

Next, you need to upload your downloadable file. This is the ebook that your customers will purchase.

To do this, scroll to the Download Files section.

Easy Digital Download's download file settings

In the File Name field, type a name for your downloadable file. You can then click on Upload a file.

This will launch the WordPress media library where you can upload or select a book.

The final step is adding an eye-catching product image. This can help catch the visitor’s attention, and encourage them to buy your ebook.

For ebooks, you’ll typically want to use the book’s front cover as your product image. You can easily create a professional-looking cover using web design software such as Canva.

To add a product image, scroll to the Download Image section.

Adding a product image for your ebook in WordPress

You can then click on the ‘Set Download Image’ link. This launches the WordPress media library.

After choosing an image, there are some more settings that you may want to explore. However, this is all you need to do in order to create a downloadable ebook.

To see how your ebook will appear on your website, you can click on the Preview button. When you’re ready to publish your product, simply click on the Publish button.

By default, Easy Digital Downloads publishes your ebook as a new page. Your goal is to drive traffic to this webpage.

This might mean adding this product page to your website’s menu. You might also link to it from different areas of your website, such as a blog post or announcement bar.

To do this, you’ll need to know the product page’s URL. You’ll find this information just beneath the product’s title.

The download link for an Easy Digital Downloads product

Another option is adding the product’s Purchase Shortcode to a page, post, or widget.

This code creates a Purchase button. 

A Purchase Shortcode for a downloadable ebook in WordPress

Whenever a visitor clicks on this button, it’ll add the ebook to their shopping cart.

The Purchase button will then change to a Checkout button.

The Easy Digital Downloads checkout button

Clicking on this button will take the shopper to the Easy Digital Download checkout page. This makes the Purchase Shortcode a great way to encourage sales from any area of your website.

To add a Purchase button to any page, post, or widget, scroll to the ebook’s Download Settings section. You can then copy the Purchase Shortcode.

How to add ebook downloads in WordPress, using Easy Digital Downloads

For more details on how to place the shortcode, you can see our guide on how to add a shortcode in WordPress.

We hope this article helped you learn how to add ebook downloads in WordPress. You may also want to see our list of 9 best PDF plugins for WordPress, and how to create a landing page with WordPress.

If you liked this article, then please subscribe to our YouTube Channel for WordPress video tutorials. You can also find us on Twitter and Facebook.

How to Add Categories and Subcategories in WordPress

Do you want to know how to create categories and subcategories in WordPress?

In WordPress, your posts can be organized into different categories and tags. You can even create subcategories for further organization. Using categories and subcategories can help your readers find the content they’re most interested in and improve your website’s SEO rankings.

In this article, we’ll show you how to add categories and subcategories in WordPress, step by step.

Categories and subcategories in WordPress

Understanding Parent and Child Categories in WordPress

Categories are a powerful tool. They’re not just a way to sort your content. They also help you develop a proper site structure that is meaningful and semantic. This is great for your WordPress SEO.

Note: If you’re not clear about the difference between categories and tags, take a look at our guide on categories vs tags. This explains why categories and tags are different, and how to use them correctly.

Now you might be wondering, why and when would someone need to use child categories (subcategories) on their WordPress website?

Let’s say you’re creating a travel blog for different destinations around the world. You might want users to be able to find articles by both country and city.

For example, you might have an article about the best waterparks in the United States. It would make sense to use ‘United States’ as the category for that post.

However, you might also have articles about the best places to eat in New York City, Los Angeles, Chicago, and more. This is where you can use child or subcategories. Then ‘United States’ can become a parent category and the cities can become child categories.

Category and subcategory in WordPress

A post filed under a child category doesn’t need to also be filed under the parent category. In our example, we could have left ‘United States’ unchecked and just put the post in the ‘New York City’ category.

If you file a post under the child category but not under the parent category, then your post will appear only on the archive pages of the child category.

Having said that, let’s take a look at how to add both regular categories and child categories in WordPress.

Adding a Category in WordPress

You can easily add a new category in WordPress when writing a post.

First, if the sidebar isn’t showing when you’re editing a post, you’ll need to click on the gear icon on the top right.

Then, in the Post panel on the right-hand side, open up the Categories tab.

where to find categories when editing a post

You’ll see different categories that you’ve already created.

However, to create a new category, you can simply click the ‘Add New Category’ link.

Adding a new category in WordPress

Once you click the link, two new boxes will appear where you can add your category.

For a regular category, you don’t need to select anything from the Parent Category dropdown.

Enter a category name and parent category

Once you’ve typed in the name for your category, simply click the ‘Add New Category’ button.

The box for that category will then be automatically checked for your current post. You can uncheck it if you want.

Preview of new category

You can also add a new category without editing a post.

Simply go to Posts » Categories and add your new category. This is handy if you want to create all your categories before adding content.

This method also lets you edit the slug (URL) for your categories. You can delete and rename categories and give them a description. See how to add SEO keywords and descriptions in WordPress.

Add a new category

Adding a Child Category (Sub Category) in WordPress

You can add and edit child categories in exactly the same way you added your parent categories.

When you’re editing a post, open the settings panel and scroll down to the Categories tab.

Next, click the ‘Add New Category’ option and type in the name for your child category. Then select the category that you want to use as the parent from the dropdown list.

Add a subcategory

Similarly, you can also go to Posts » Categories to add child categories.

Just type in the name for your child category and select the parent category from the dropdown menu.

Select a parent category

Your child categories can also have their own child categories if you want.

For instance, we might decide to develop a category structure that is used to group multiple types of content together, like this:

Preview of category structure

Here, News is a category, with the Announcements as child categories.

Categories on the same level within a parent category are sometimes called ‘sibling’ categories. For instance, the Announcements and SEO Tools are sibling categories here.

Categories can only have one parent. You can’t add one sub-category under two different parent categories.

SEO Benefits of Category Based Site Structure

Your category URLs will look something like this:

https://example.com/category/united-states/new-york-city/

This is meaningful and helps search engines and visitors understand what your page is about. You also get a chance to add keywords to your URL. Keywords help people find content on search engines.

WordPress also allows you to easily change the /category/ prefix of your category URLs. You can even remove it completely if you want.

Simply go to the Settings » Permalinks page from the WordPress admin panel and scroll down to the ‘Category base’ section.

Change category permalink settings

Here you can enter the prefix you would like to use and click on the ‘Save Changes’ button to store your changes.

The ‘category’ prefix in your category URLs doesn’t add any benefit to your SEO.

This is why some website owners prefer to remove the remove the word ‘category’ from their WordPress category archive pages’ URLs. You can easily do this by using the All in One SEO plugin, so your category URLs look like this:

http://example.com/united-states/new-york-city/

Simply go to the Search Appearance menu for AIOSEO and then select the Taxonomies tab. Under the Advanced settings for Categories, you will see the option to remove category base prefix.

AIOSEO Remove Category Base Prefix

Alternatively, you can also use the FV Top Level Categories plugin. Simply install the plugin and it will remove the word ‘category’ from your category archive pages’ URLs.

Important: If you decide to change the category base on an existing WordPress site, then you’ll need to set up redirects to avoid 404 errors for search engine visitors. For more detailed instructions, please follow our guide on how to change the category base prefix in WordPress.

How to Display Categories and Child Categories in WordPress Sidebar

You can add a widget block to your WordPress sidebar or footer to show a list of categories. In your WordPress dashboard, go to Appearance » Widgets.

If you haven’t changed your widgets from the ones that WordPress puts there by default, you should see the Categories widget block already in place. If not, then you can click the ‘+’ button and add a ‘Category’ block to your widget area.

Add a category widget block

By default, the widget will show all your categories in a flat list, in alphabetical order.

Here’s a preview of how they looked on our test website:

Preview of categories in sidebar

Tip: Categories will only display on the list if you’ve assigned at least 1 published post to them.

You can change it to show the child categories (subcategories) beneath their parent categories if you want. Simply enable the ‘Show hierarchy’ option in the widget settings like this. Don’t forget to click the ‘Update’ button.

Show hierarchy in widget blocks

On your site, you should now see your parent categories with the child categories nested beneath them.

Tip: If your sidebar changes don’t show up, you might need to clear your WordPress cache.

Aside from the default category widget block, you can also create custom category menu links using the WordPress navigation menu. After that, you can add that menu to your header menu, sidebar, footer, or other menu locations.

We hope this tutorial helped you learn how to add categories and child categories in WordPress. You may also want to take a look at our article on how to create an email newsletter to grow your website traffic, and our comparison of the best WordPress page builders to create custom layouts.

If you liked this article, then please subscribe to our YouTube Channel for WordPress video tutorials. You can also find us on Twitter and Facebook.