Are you properly tracking user engagement on your WordPress site?
User engagement is one of the most important metrics to track because it helps you better understand your audience and what they want. With Google Analytics, you can easily see how people interact with your website.
In this article, we will show you how to track user engagement in WordPress with Google Analytics.
Why Track User Engagement with Google Analytics
Generally, WordPress website owners consider traffic and pageviews to be the most important indicators of their website’s performance. They assume that higher traffic will result in more conversions and sales.
While that is true, you can get even better results by tracking and optimizing user engagement.
User engagement shows you what users do when they arrive on your website. It helps you identify patterns of highly engaged user behavior which leads to more conversions and sales.
For example, you may realize that users visiting a specific page are 10X more likely to make a purchase than any other visitor on your website. You can use this insight to redirect the user’s attention to that page.
Similarly, tracking user engagement can help you see which affiliate links or banner ads your visitors are clicking. Using this data, you’ll be able to optimize your content to get more clicks and boost conversions.
That said, let’s see how you can set up user engagement tracking in WordPress using Google Analytics.
Tracking User Engagement in WordPress using Google Analytics
MonsterInsights automatically sets up outbound link tracking, form conversion tracking, scroll depth, affiliate link clicks, and other advanced tracking features in Google Analytics out of the box.
It automates the process of pasting different analytics codes and event tracking in WordPress, so you don’t have to deal with the hassle of code and configuration.
For this tutorial, we’ll use the MonsterInsights Pro version because it includes advanced tracking features and more dashboard reports. However, there is also a MonsterInsights Lite version that you can use for free and get started with user engagement tracking.
First, you will need to install and activate the MonsterInsights plugin. If you need help, then please see our guide on how to install a WordPress plugin.
Upon activation, you’ll see the MonsterInsights welcome screen. Go ahead and click the ‘Launch the Wizard’ button.
For more details, please see our guide on how to install Google Analytics in WordPress.
MonsterInsights also helps set up Google Analytics 4 (GA4) in WordPress with its dual tracking feature. This allows you to use Universal Analytics and GA4 together.
Google Analytics 4 is the latest version of Analytics, and it will replace Universal Analytics on July 1, 2023. After this date, you won’t be able to track data in Universal Data. To protect your tracking data, we highly recommend creating a GA4 property.
Now that you have Google Analytics with MonsterInsights ready to go, let’s take a look at what user engagement metrics are best to track and how you can track them.
These aren’t all of the metrics you can track with MonsterInsights and Google Analytics, but they are the most important ones to start with. You can click the links below to jump ahead to any section:
The first thing you want to figure out is which posts and pages on your WordPress blog are popular amongst your users. These important pages and posts on your website get the most traffic.
Figuring out what your users like on your site can help you plan a content strategy that expands on what’s already working.
MonsterInsights makes it really simple. You just need to visit the Insights » Reports page in your WordPress admin area and go to the ‘Overview’ report.
After that, you can scroll down to see other reports with different data.
You will find your most popular content under the ‘Top Posts/Pages’ section.
On most websites, 90% of their traffic goes to 10% of the top pages.
Once you find these top pages, you can optimize them for maximum conversions by adding content upgrades or targeted lead magnets on these posts.
2. Tracking How Users Engage with Forms on Your Website
Most websites rely on contact forms to collect user leads and feedback. Sadly, most WordPress contact form plugins don’t give you accurate tracking and conversion data.
MonsterInsights lets you leverage the events tracking feature in Google Analytics to see how many times your forms are viewed and submitted.
To enable form tracking, you need to visit the Insights » Addons page. On this page, you will need to install and activate the Forms addon.
Once you have activated the addon, MonsterInsights will automatically start tracking all forms on your website.
You can check the settings by going to Insights » Settings from your WordPress dashboard and then clicking on the ‘Conversions’ tab.
Next, MonsterInsights shows the performance of your WordPress forms inside your dashboard.
Simply go to Insights » Reports from the admin panel and click on the ‘Forms’ tab. The report shows the number of impressions and conversions, as well as the conversion rate for your different WordPress forms.
3. Tracking Ecommerce Stores Performance in Google Analytics
Google Analytics offers many features specifically for eCommerce websites. However, these features are not turned on by default in Google Analytics, and most users don’t even know that they exist.
Ecommerce tracking lets you see shopping behavior, checkout behavior, product performance, sales performance, and so much more. The best part is that you can combine this data with your overall website traffic to gather better insights.
With MonsterInsights, you can easily set up Enhanced eCommerce on your website without editing code. It seamlessly works with popular plugins like WooCommerce, Easy Digital Downloads, MemberPress, GiveWP, and more.
Once you’ve configured tracking, you can head to Insights » Reports from your WordPress admin menu and click on the ‘eCommerce’ report.
Using the report, you can quickly see how your online store is performing. It shows stats like conversion rate, number of transactions, revenue, and average order value.
It also helps identify products that users engage with the most and where they’re coming from.
You can also view the eCommerce report in your Universal Analytics property. Simply visit your Google Analytics account and go to Conversions » Ecommerce page.
Here are a few powerful reports you get by enabling Enhanced eCommerce tracking on your store:
On the other hand, you can view the eCommerce reports directly inside in your Google Analytics 4 dashboard by going to Reports » Monetization » Ecommerce purchases.
4. Tracking Who’s Clicking on Your AdSense Ads
Many websites rely on ads to make money online while creating useful content. However, with Google Analytics you can actually see how users interact with ads on your site.
For instance, you’ll be able to track how many clicks each ad is receiving, discover which ads your audience is ignoring, identify the most effective ad placements, and more.
First, you need to integrate Google Analytics into your Google Adsense account.
Head over to your Google Analytics dashboard and click on the ‘Admin’ button located at the bottom left corner of the screen. On the admin page, click on ‘AdSense Links’ under the property column.
Next, you’ll need to select the AdSense property that you want to link with your Analytics property.
To view the right AdSense property, just make sure that you’re signed in with the same Google account you used on both AdSense and Google Analytics.
After that, click on the ‘Link configuration’ option.
Here, you can select the Analytics view in which you want your AdSense data to be available.
After you have configured everything in Google Analytics, you can now see how your AdSense ads are performing.
To view your AdSense reports, go to your Google Analytics account and visit the Behavior » Publisher page.
5. Tracking How Far People Scroll Your Website
When tracking user engagement in WordPress, it’s also important to see how far visitors scroll your website.
It gives you insights into how people use your site and helps improve your page length. Plus, you can use the data to place your AdSense ads, call-to-action buttons, and affiliate links where they’d get the most visibility and conversions.
MonsterInsights automatically enables scroll-depth tracking. You can view the report by going to Insights » Reports from the WordPress admin panel and clicking the ‘Publishers’ tab.
Next, scroll down and view the ‘Scroll’ report.
It will show the average scroll depth percentage. MonsterInsights will trigger events in Google Analytics 4 as users scroll 25%, 50%, 75%, and 100% of a page and compute the percentage from those results.
6. Tracking Your Affiliate Links in Google Analytics
Most marketers use affiliate plugins to manage and cloak affiliate links. This makes your affiliate links look more user-friendly. Here is an example of a cloaked affiliate link:
https://example.com/recommends/product-name/
MonsterInsights allows you to track affiliate links in Google Analytics. This helps you figure out which affiliate products are doing well, which pages are generating more affiliate revenue, and more.
To enable affiliate link tracking, you need to visit the Insights » Settings page. Next, you can switch to the ‘Publisher’ tab and head to the Affiliate Links section.
First, you need to enter the prefix for your link under the Path field, like ‘/refer/’ or ‘/recommend/.’ After that, you need to provide a Label that you would like to use for those links in your Google Analytics reports.
When you’re done, click on the ‘Save Changes’ button to store your settings.
Next, you can view your top affiliate link clicks in MonsterInsights reports. Simply head to the Publishers tab and scroll down to the ‘Top Affiliate Links’ section.
Here, you will see which affiliates are getting the most clicks, so you can promote them more on your site and boost sales.
Additionally, MonsterInsights will also show your Top Outbound Links. These are external links that people click and exit your site. You can use insights from this report to get more backlinks, form partnerships, signup for affiliate programs, and exchange guest posts.
Bounce rate is the percentage of users who land on your website and decide to leave without going to a second page.
With MonsterInsights, you get to see the overall bounce rate of your website inside the WordPress dashboard. Simply go to Insights » Reports from your WordPress admin menu and click on the ‘Overview’ tab.
Besides that, the plugin also shows the bounce rate for your important pages.
You can go to the Publishers report and view the ‘Top Landing Pages’ section. In the report, you’ll see the bounce rate for different content.
A higher bounce rate indicates that you were unable to convince the user to visit other pages. Users can leave your website by clicking on the back button in their browser, clicking on an outgoing link, or by closing the window.
Every site has a bounce rate. However, higher bounce rates can indicate problems with your website affecting user experience and causing low engagement.
To lower the bounce rate, you can speed up your website, improve internal links, ensure that your content meets the search intent, improve the readability of your articles, show popular posts, and more.
Another indicator that shows user engagement is session duration, or the amount of time users spend on your site.
If users are abandoning your site without spending enough time to look at it, then something is wrong and you need to fix it.
In the MonsterInsights Overview report, you can see the average session duration for your website in the past 30 days.
If you’re using Google Analytics 4, then you’ll see a new metric called average engagement time. It tells the average time your webpage was in the focus of a user.
You can view the report by logging into your GA4 account and then head to Reports » Engagement » Overview.
Using the data, you can better understand your user journey. If the engagement time is low, then you can look into issues like fixing slow site speed, debugging any errors, and making your site’s interface user-friendly.
9. Tracking Pageviews Per Visit with Google Analytics
Pageviews Per Visit is another excellent indicator of how engaged your users are. Higher pageviews per session means people are visiting multiple landing pages and articles on your site. This in return helps increase the time users spend on your site and decreases bounce rates.
Universal Analytics will show you the total page views for a given period on the Audience » Overview page. However, to track user engagement you want to see Pageviews per session.
You can also break down page views per session by source and channel.
Simply go to the Acquisition » All Traffic » Channels page.
In Google Analytics 4, you can view the sessions per user metric based on different traffic sources and see how many pages users view in a single session.
Just head to Reports » Acquisition » User acquisition from your GA4 property.
This helps you see which traffic channels are converting the best for your website. You can then focus your content marketing efforts on areas that are actually driving results.
We hope this article helped you track user engagement in WordPress with Google Analytics. You may also want to see our ultimate step-by-step WordPress SEO guide and how to create an email newsletter the right way.
If you liked this article, then please subscribe to our YouTube Channel for WordPress video tutorials. You can also find us on Twitter and Facebook.
Are you looking for the easiest way to fix the ‘this site can’t be reached’ error in WordPress?
You can get this error on any website, including third-party sites and your own WordPress blog. If this error shows up on your own site, then it’s a big problem as it can stop you from accessing the admin area.
In this article, we will show you how to easily fix the ‘this site can’t be reached’ error.
What Is the ‘This Site Can’t Be Reached’ Error in WordPress?
There are lots of common WordPress errors, but ‘this site can’t be reached’ is especially frustrating because the message is vague, and it doesn’t tell you what to do next.
In the worst-case scenario, this error can stop you from visiting your own website. That will make it difficult to test your WordPress site, add new content, install security updates, and make other important changes.
Usually, the error means that something is stopping the browser from accessing the destination website. This could be anything from an internet outage, to a misconfigured network, or even an issue with your DNS settings.
In this guide, we’ll take a closer look at why you may be seeing this error, including exploring the different error codes. When you encounter a problem, you’ll typically want to solve that problem as quickly as possible.
If you’re unsure what’s causing the issue, then we recommend starting with step one since it’s the easiest. However, if you prefer to jump straight to a particular step, then you can use the quick links below.
When troubleshooting an error, it’s smart to try the simplest fix first. To start, check that you’re currently connected to the internet.
If there is no obvious problem with the connection, then the next step is restarting your internet connection. Similar to switching your computer off and on, resetting your entire connection can fix all kinds of small problems and get you back on track.
We recommend disconnecting your router from its power supply and then waiting at least 1 minute before reconnecting it. You can then try visiting the website again to see whether this has removed the error message.
To solve this problem, most modern web browsers store files, data, and other content from the websites you visit. The browser can then simply load this cached content from the local computer, rather than re-downloading it from a remote server.
This helps websites to load faster, but it can sometimes cause problems. For example, cached content can become outdated or get corrupted over time.
Thankfully, it’s easy to clear the browser cache. If you’re using Google Chrome, then simply click on the three-dotted icon in the upper-right corner.
Then, select ‘More Tools,’ followed by ‘Clear Browsing Data….’
In the popup that appears, check the box next to ‘Cached images and files.’
Google Chrome will clear the entire cache by default. Another option is to open the ‘Time Range’ dropdown and tell Chrome to only clear content that was cached during a particular time period.
Once you’ve done that, you can check or uncheck any of the other options. For example, the ‘Browsing History’ checkbox is selected by default, but you can uncheck this box if you want to keep your browsing history.
When you’re ready, click on ‘Clear data.’
Google Chrome will now empty the browser cache. Once it’s finished, try revisiting the website to check whether you’re still getting the ‘this site can’t be reached’ error.
Antivirus and firewall plugins can keep you safe, but they can also block websites that are perfectly trustworthy.
This might be a problem with how your security plugins and software are configured. For example, your settings may be too strict.
Other times, the website may be set up in a way that triggers your security software even if that website doesn’t pose a real threat.
For instance, if you’re still building your WordPress website, then you might not have an SSL certificate yet. Many firewalls will stop you from visiting a site that doesn’t have a valid certificate, so this may trigger the error.
To test whether a firewall or antivirus program is blocking the connection, simply disable that software. Then, visit the website that was showing the ‘this site can’t be reached’ error.
If the site loads without a problem, then you’ll know that the antivirus program or firewall was to blame.
If this is the case, then we don’t recommend disabling it completely.
Instead, it’s smart to check the software’s settings to see whether you can whitelist a particular website. In this way, you can access the site while still protecting yourself against hackers, viruses, and other digital threats.
If you’re not sure where to find these settings, then try checking the software’s official documentation, forums, or social media pages for more information. Depending on your software license, you may also be able to contact customer support or the developer for help.
For more tips on protecting yourself against hackers without triggering the ‘this site can’t be reached’ error, please see our ultimate WordPress security guide.
4. Reset Your Virtual Private Network
A Virtual Private Network (VPN) can protect your privacy, keep your information secure, and allow you to visit sites that are blocked or censored in your location.
However, if you’re using a VPN then your connection may drop, or the VPN may not recognize the IP address that you’re using. Some VPNs will reconnect automatically if they encounter a problem, but you may have to reconnect manually.
If you get the ‘site can’t be reached’ error when using a VPN, then we recommend checking your provider’s website or documentation for instructions on how to reset your VPN.
5. Disable Your Proxy Server
A proxy server sits between you and the websites you’re trying to visit. Many people use these ‘middle-man’ servers as an extra layer of security, or to cache data.
If your proxy server can’t connect to a website, then you’ll see the ‘site can’t be reached’ error. You may also get this error if you can’t connect to the proxy server in the first place.
In this case, the easiest fix is to simply disable the proxy server. If you’re on a Mac, then go ahead and click the ‘Apple’ icon in the toolbar.
Then, select ‘System Preferences…’
In the popup that appears, click on ‘Network.’
In the left-hand menu, select the network where you want to disable the proxy settings.
Once you’ve done that, click on the ‘Advanced…’ button.
In the popup, simply select the ‘Proxies’ tab.
You can now uncheck all of the protocols listed under ‘Select a protocol to configure.’
Finally, click on the ‘OK’ button to save your changes. You can now try visiting the website to see whether you can access it without any problems.
6. Flush Your DNS cache
Similar to the browser cache, your computer stores the IP addresses of all the websites you visit. This means the browser doesn’t have to look up the same IP address multiple times.
This helps websites to load faster, but the cached DNS information can get outdated. This may trigger a ‘site can’t be reached’ error, particularly if the site has moved to a new domain name or you’ve moved WordPress to a new host.
By flushing your DNS cache, you’ll get the very latest information about a website, including its new domain name or address.
To help you out, we’ve created a complete guide on how to clear your DNS cache for Mac, Windows, and Google Chrome.
7. Change Your DNS Server
DNS is like the internet’s phone book. Instead of listing people’s names and phone numbers, the DNS lists domain names and their corresponding IP addresses.
Your internet service provider assigns you a DNS server automatically. However, sometimes this server may be unavailable, or it might have the wrong information.
If your browser doesn’t have a site’s correct address, then you’ll get a ‘this site can’t be reached’ error.
You can solve this problem by switching to a different public DNS server, such as Google Public DNS. You can use any public server you want, but just be aware that the DNS provider will be able to see all the websites you visit.
With that being said, it’s smart to research your DNS provider carefully.
Once you’ve found a DNS server that you want to use, it’s time to switch to that server. On Mac, this means selecting the ‘Apple’ icon in the toolbar and then clicking on the ‘System preferences…’ option.
In the popup that appears, select ‘Network’ and then click on the ‘Advanced…’ button.
Once you’ve done that, open the ‘DNS’ tab.
In the bottom-left corner, click on the ‘+’ button.
This adds a new DNS server with the address 0.0.0.0.
You can now go ahead and type in the numbers for the public server that you want to use.
After that, simply click on the ‘OK’ button to save your changes.
This takes you back to the previous popup.
To start using your new DNS server, click on the ‘Apply’ button.
Finally, you’re ready to visit the website to see whether this has removed the error message.
8. Reset the TCP/IP Settings
Transmission Control Protocol/Internet Protocol (TCP/IP) is a set of protocols that control how data is sent and received over the internet.
If there’s a problem with how your internet connection is configured, then renewing your TCP and IP protocol will return the connection to its default settings, which may solve the problem.
To reset the TCP/IP settings on Mac, select the ‘Apple’ icon in the toolbar and then click on ‘System Preferences…’
In the popup that appears, select ‘Network’ and then click on the ‘Advanced…’ button. Once you’ve done that, open the ‘TCP/IP’ tab.
On this screen, go ahead and click on the ‘Renew DHCP Lease’ button.
That’s it. You can now try visiting the website or blog, to check whether you still get the same ‘site can’t be reached’ error.
What Causes ‘This Site Can’t Be Reached’ Error in WordPress?
There are a few different reasons why you may get this error message, but the code that appears next to the message can help you pinpoint the cause.
Let’s take a closer look at these codes and what they mean for your WordPress blog.
ERR_CONNECTION_RESET
Sometimes, you’ll see an ERR_CONNECTION_RESET code next to the ‘site can’t be reached’ error. Most of the time, this means there’s a problem with your internet connection.
The most obvious problem is an internet outage, but there’s also software and settings that can interfere with the connection and trigger an ERR_CONNECTION_RESET. For example, VPNs and proxy servers can sometimes cause this error code.
DNS_PROBE_FINISHED_NXDOMAIN
Domain Name System (DNS) lets you connect to websites by matching a user-friendly domain name such as www.wpbeginner.com, with the ID of the server where this website is stored.
You’ll get this error code if Google Chrome can’t resolve the domain name or address for the website that you’re trying to access.
Since it can’t connect, the browser assumes that the domain name doesn’t exist. It then shows a DNS_PROBE_FINISHED_NXDOMAIN error code, where the NXDOMAIN part of the error stands for ‘non-existent domain. ‘
If you see this error code next to the ‘site can’t be reached’ message, then it usually means there’s a problem with how your DNS settings are configured.
Do you want to add wholesale pricing in WooCommerce for bulk purchases and wholesale buyers?
Wholesale pricing can make your online store more attractive to retailers that need to place large orders which can greatly increase the average order value. By default, WooCommerce only allows you to set normal pricing for a product.
In this article, we will show you how to easily set up WooCommerce wholesale pricing for customers who want to place bulk orders.
Why Setup WooCommerce Wholesale Pricing in WordPress?
If you have enough resources and staff to manage really large orders, then you may want to set up wholesale pricing for your online store.
By offering a discount on bulk orders, you can make your store much more attractive to companies or organizations who need to buy in bulk.
Customers who place large orders can have a big impact on your profits and help you grow a successful WooCommerce store, so it makes sense to offer wholesale pricing.
You can also use wholesale pricing to offer discounts to dropshipping businesses. By partnering with a successful dropshipping business, you can set up another source of revenue without having to deal with consumers directly. This means more sales without much extra effort.
By default, WooCommerce doesn’t allow you to offer different pricing based on quantity or the customer’s user role.
This means your wholesale customers will need to manually negotiate prices and discounts to place their orders. This takes a lot of time and effort, and will often cause delays which can affect the customer experience.
If you don’t offer automated discounts for wholesale customers, then those customers will eventually look elsewhere.
That being said, let’s take a look at how to easily add wholesale pricing in WooCommerce so customers can place big orders, fast.
How to Setup the WooCommerce Wholesale Suite Plugin
For this guide, we’ll be using the WooCommerce Wholesale Suite. It is a suite of three plugins that allow you to sell wholesale products on your WooCommerce store and manage your wholesale customers.
You can now enter your email address and license key.
You’ll find the license key by logging into your Wholesale Suite account. This information is also included in your purchase confirmation email.
After adding this information, click on the ‘Save Changes’ button.
By default, Wholesale Suite creates a new role called ‘Wholesale Customer’ when activated. This role allows you to offer a discount to all your wholesale clients at once, without impacting other customers.
By default, anyone who has a ‘Wholesale Customer’ role will see the discounted pricing when they log into their account.
To create a ‘Wholesale Customer’ account, go to Users » Add New.
Here, enter all the information you want to use such as the username and email address. Be sure to enter your customer’s business email address so that they will get a notification their account has been created for them.
Then, just open the ‘Role’ dropdown and choose ‘Wholesale Customer.’
After that, scroll to the bottom of the screen and click on the ‘Add New User’ button.
You can now create more wholesale customer accounts simply by repeating the process described above.
How to Add Wholesale Pricing in WooCommerce
Once you’ve created some wholesale accounts, the next step is offering them an exclusive discount.
One option is to set up wholesale pricing for one or more WooCommerce products. Simply create a new product or open an existing product for editing.
Then, scroll to the ‘Product Data’ section. If you haven’t already, then you can set the ‘Regular Price’ which will be offered to everyone who visits your WordPress website. You can also set a sale price.
After that, scroll to the ‘Wholesale Prices’ section and open the ‘Discount Type’ dropdown. You can now choose to offer wholesale customers a fixed discount or a percentage discount.
If you select ‘Percentage,’ then you can type an amount into the ‘Discount (%)’ field. Wholesale Suite will then work out the price and show the value in US dollars.
If you choose ‘Fixed’ from the dropdown menu instead, then you can simply type the amount into the ‘Wholesale Price’ field.
After that, scroll to the ‘Wholesale Minimum Order Quantity’ section. Here, type in the minimum number of items a customer must purchase to unlock the wholesale pricing discount.
This is all you need to add wholesale pricing, so you may want to go ahead and update or publish the product.
Now, any wholesaler who is logged into their account will see the discounted price next to the product’s regular price.
However, there are some extra things you can tweak for a product’s wholesale pricing.
Setting up Quantity Based Wholesale Pricing
You can encourage wholesale customers to buy more units by offering tiered discounts. For example, you might offer a 25% discount if the customer buys at least 50 units and a 50% discount if they buy more than 100 units.
To create tiered discounts, check the following box: ‘Enable further wholesale pricing discounts based on quantity purchased?’
This adds some new settings where you set the starting and ending quantity, plus the discount you want to offer.
After entering this information, click on ‘Add Quantity Discount Rule.’
You can add more tiers to your pricing simply by following the process described above.
Enforce a Minimum Order for Wholesale Customers
By default, customers with the wholesale role can buy less than the minimum number of products. If they do, they won’t qualify for the wholesale discount.
You may want to limit wholesale customers from buying less than the minimum, just like other users. This can improve the customer experience by making sure wholesalers always get their special wholesale discount.
It can also be useful if you’ve made exceptions for a customer because they buy in bulk. For example, you may not offer free shipping because of high postage costs. However, you might be willing to pay the extra fees if they buy in bulk.
In this case, you’ll want to stop the customer from placing smaller orders and taking advantage of the shipping exception.
To strictly enforce the minimum order quantity for this particular product, scroll to the ‘Wholesale Order Quantity Step’ section and then type a ‘1’ into the field.
Don’t forget to click on the ‘Publish’ or ‘Update’ button to save your changes to the product.
After that, go to Wholesale »Roles in the WordPress dashboard. You can now hover over the ‘Wholesale Customer’ role and click on the ‘Edit’ link when it appears.
On this screen, check the following box: ‘Prevent purchase if wholesale condition is not met.’
Once you’ve done that, just click on the ‘Edit Wholesale Role’ button to save your changes.
Now, anyone with the ‘Wholesale Customer’ role won’t be able to checkout unless they meet the minimum quantity.
Creating New Wholesale Customer Roles
By default, Wholesale Suite creates a new rolled called ‘Wholesale Customer.’ If you want to offer the same discount to all your wholesale clients, then you can simply use this default role.
However, to improve the customer experience, you may want to create different wholesale roles with different discounts, or even entirely different perks.
For example, you might give a larger discount to the wholesaler who places the biggest order. In this way, you can keep your valuable customers coming back to your online store.
To create more roles, go to the Wholesale » Roles page.
You can now give the role a name, a key, and type in an optional description.
When you’re happy with the information you’ve entered, click on ‘Add New Wholesale Role.’
You can now assign this role to any customer by opening that person’s user profile in the WordPress dashboard.
Here, simply open the ‘Role’ dropdown and select the wholesale role you just created.
You can also create different wholesale prices for the different user roles.
Simply open any product and scroll to the ‘Wholesale Prices’ section. You’ll now see different settings for each of the user roles.
Setting up Global Discounts for Wholesale Customers
A lot of the time, you will want to add a different wholesale price to each product. However, the Wholesale Prices WooCommerce plugin also allows you to set a global percentage discount for all products.
Wholesale Suite will apply the global discount to all products that don’t have a specific wholesale price set up. This allows you to offer store-wide benefits to wholesalers.
However, just be aware that there’s no minimum order value. This is a great way to encourage wholesalers to try new products by placing small orders, but you should also think about the impact this will have on your profits.
To create a global discount for wholesale customers, go to WooCommerce » Settings. Then, click on the ‘Wholesale Prices’ tab.
As the WordPress block editor adds more site editing features, we have been asked if it is meant to be a replacement for drag and drop WordPress page builder plugins?
The WordPress block editor is quite intuitive and can be used to create beautiful content layouts. However, it is still no match for the powerful page builder plugins.
In this article, we’ll compare WordPress block editor vs page builder plugins to help you understand the difference.
WordPress Block Editor vs Page Builders (Explained)
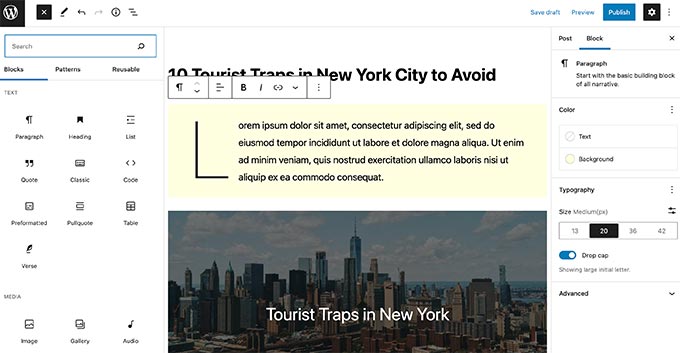
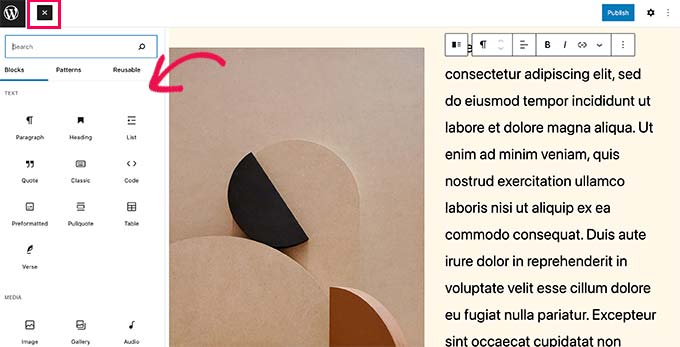
The block editor is the default editor in WordPress. It uses blocks for common website elements (hence the name, Block Editor).
When creating posts and pages on your WordPress site, you can use the block editor to add and edit your content. The block editor is also used for all your widget areas. And now, some themes called ‘block themes’ even support using the block editor for every area on your website.
Since the block editor allows you to use blocks for creating content layouts, it is easy to confuse it with a drag-and-drop page builder.
However, it is still nowhere close to being called a page builder.
WordPress page builder plugins are drag-and-drop design tools allowing you to create custom WordPress website designs without writing any code.
They come with ready-made templates that you can use and offer much more design flexibility than WordPress block editor.
To understand better, let’s take a deeper look at the differences between WordPress block editor and Page Builders.
Key Differences Between Gutenberg and Page Builder Plugins
The biggest difference is that the block editor comes built-in with WordPress core software as the default editor.
On the other hand, page builder plugins are created and supported by third-party developers.
WordPress.org team does not call the default editor a page builder. Instead, they call it the block editor, and it’s presented as a modern way to edit your website in WordPress.
There’s a big reason for that, and it’ll become very clear as you read the differences between the two.
1. Theme Compatibility & Support
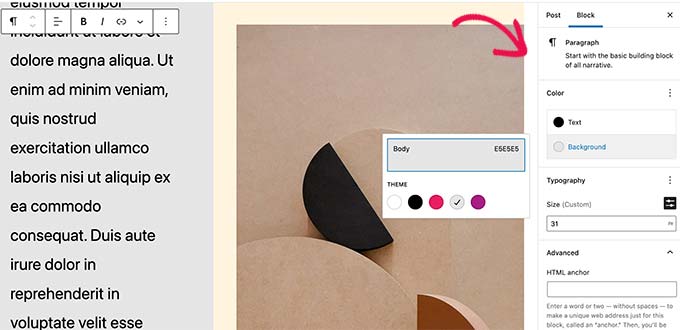
The WordPress block editor relies heavily on your theme styles. It does add some of its own CSS and even allows you to add custom CSS for blocks, but it doesn’t override your theme styles and settings.
While page builder plugins can work with your theme styles, they also give you the option to completely take over a page and override your theme’s styles.
Some WordPress page builders like SeedProd are completely theme agnostic. This means that pages created with SeedProd would look the same even if you change your WordPress theme.
This is extremely helpful if you want to create custom layouts for all website pages.
2. Blocks and Widgets
WordPress block editor comes with a decent set of default blocks covering all the commonly used content elements. You can also save and reuse blocks in other posts and even on other WordPress websites.
It has a powerful API allowing plugin developers to create their own blocks. All top WordPress plugins also have their own WordPress blocks that you can use.
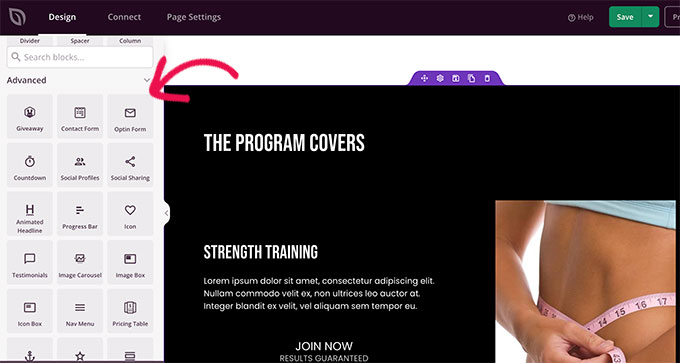
On the other hand, WordPress page builders come with even more blocks.
They offer advanced content elements, including carousels, sliders, call-to-action buttons, contact forms, countdown timers, and more.
You can also save individual blocks, rows, or entire templates to reuse later.
3. Formatting & Styling Options
The blocks in the WordPress block editor come with their own styling and formatting options. However, these options are limited.
For more styling and formatting, you’ll have to add your own custom CSS for a block.
Page Builders, on the other hand, offer more styling options by default.
You can change the background colors of blocks, use gradients, use font-icons, select fonts, line height, adjust the width of elements, use styles on images, and more.
4. Templates, Patterns, and Sections
The block editor comes with patterns, which are sets of blocks to quickly insert commonly used areas on a WordPress blog.
For instance, you can use block patterns for headers, call-to-action buttons, columns, and more.
Your WordPress theme may come with its own patterns. You can also find and install patterns from WordPress.org’s patterns library.
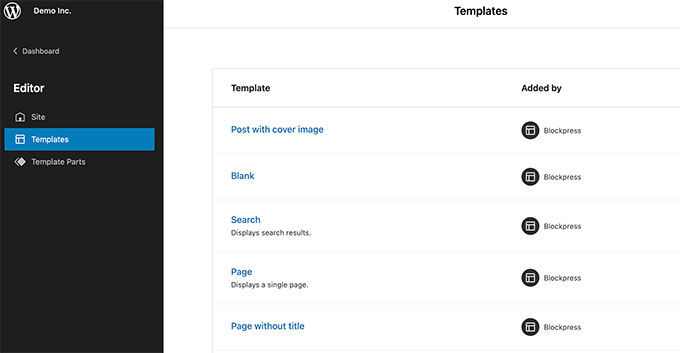
If you are using a block theme (themes that support full site editing), then you can also edit theme templates. Your WordPress theme may come with templates you can edit using the block editor.
However, these templates are generic and provide functionality to display common pages of a typical WordPress website.
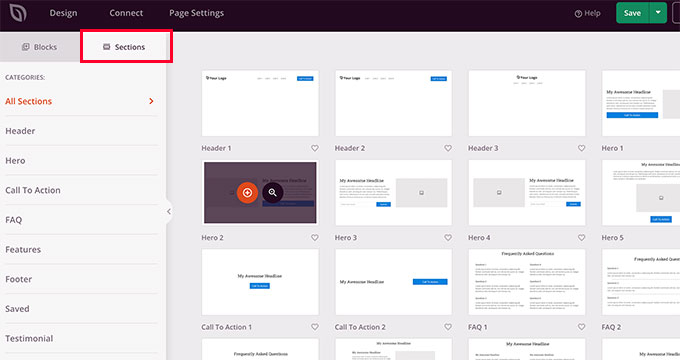
WordPress page builder plugins come with more pre-made templates and sections or patterns.
Unlike block editor, these sections and templates don’t rely on your WordPress theme for styling.
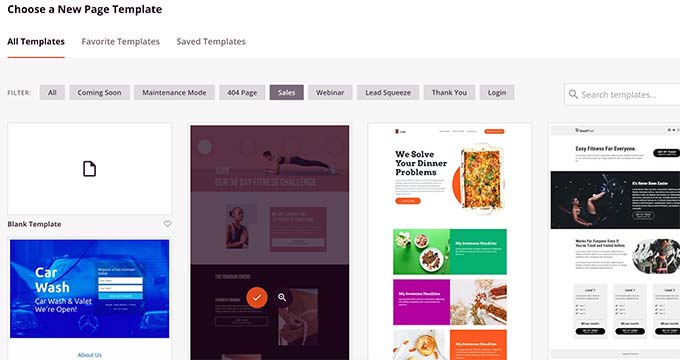
Most WordPress page builder plugins come with dozens of ready to use templates that are highly optimized for conversions.
Plus, you also get templates for specific business types and websites which makes it much faster to customize them for your own needs.
5. Drag and Drop Features
The WordPress block editor is not a drag and drop design tool (at least, not in its current form).
You can add blocks and move them up and down, but you cannot adjust their width/height using your mouse, move blocks next to each other, or create complex layouts.
The block editor comes with group and column blocks that can be used to create beautiful page layouts.
On the other hand, page builders allow you to drag and drop blocks/widgets, adjust their height and width, create columns and add blocks inside other blocks.
These drag and drop allow you to design your pages and complete websites easily.
6. Full Site Editor vs WordPress Page Builders
You can also use the block editor to edit your WordPress theme. However, you’ll need a WordPress theme that supports the full site editor to try this out.
The WordPress full site editor comes with sitewide blocks like query block, site logo, navigation menus, and more.
You can edit your theme templates like header, footer, homepage, and more.
However, the full site editing feature requires using a supported theme. Your changes will disappear if you change your WordPress theme.
On the other hand, WordPress page builder plugins allow you to create individual pages to create your website. They can work with any WordPress theme, and you can change your WordPress theme.
You can easily edit any section or page of your theme with the drag and drop builder. It even lets you select conditions for displaying each template. For example, you could display different sidebars for different sections of your site.
7. Development Goals
The default WordPress block editor is developed to make it easier for users to create content and edit their websites. It is intended to be used by everyone including bloggers, writers, photographers, and businesses.
The page builder plugins offer ability to create conversion and sales oriented pages without much effort. They are intended to be used by small businesses, aspiring designers, WordPress agencies, eCommerce stores, and more.
While the block editor helps you create better content, page builder plugins help you create better landing pages that help you increase sales, boost subscribers, and grow your business.
Can or Will the Block Editor Replace WordPress Page Builders?
In its current form, the block editor is a good content editor and an easy way to edit and customize your WordPress theme.
However, it is currently not a replacement for powerful drag and drop page builder plugins.
With that said, it is in the WordPress roadmap to expand block editor functionality and promote full site editing features.
We will have to wait and see the improvements to determine if block editor will ever come close to the powerful WordPress page builder plugins.
Which Page Builder Plugin to Use with the Block Editor?
All top WordPress page builder plugins work well with the WordPress block editor. You can take a look at our pick of the best WordPress page builder plugins, and how they stack up against each other.
If you’re looking for an easy-to-use and powerful WordPress page builder, then we recommend SeedProd. It offers a drag and drop builder and over 200+ built-in themes to create any type of landing page without coding.
The plugin is lightweight and ensures that your pages load quickly, helping your rank higher in SEO. It also integrates with popular email marketing services such as Constant Contact, Drip, ConvertKit, and more.
Do you want to use Google Search Console to grow your website traffic?
Google Search Console is a powerful free tool created by Google to help website owners understand how Google sees their website. Unfortunately, most businesses don’t know how to effectively use the full power of Google Search Console to increase their website traffic.
In this article, we will show you how to properly use Google Search Console to improve your website SEO and get more visitors.
What is Google Search Console?
Google Search Console is a free tool offered by Google to help website owners monitor and maintain their site’s presence in Google search results.
It provides essential marketing data that you need to start tracking from day one. It also alerts you about errors, security issues, and indexing problems that may affect your website’s search rankings.
You can use all this information in your WordPress SEO strategy to increase your website traffic.
The sad part is that most businesses don’t utilize the full power of Google Search Console because most of them think that just adding their website to Google Search Console is enough.
There’s so much more that you can do with the tool.
If you’re not leveraging all of the powerful features that Google Search Console offers, then you’re missing out.
Luckily, we’re here to help. We have created this ultimate Google Search Console guide to help you grow your website like a Pro.
Note: Since this is a comprehensive guide, we have added a table of contents for easier navigation.
If you haven’t already done so, then you need to go ahead and add your website to Google Search Console. It is really simple and will only take a few minutes.
You’ll be asked to sign in using a Google / Gmail account. Once logged in, you will need to enter your website URL.
Google Search Console offers 2 methods for site verification, including domain name or URL prefix. We recommend using the URL Prefix method as it provides more flexibility.
Do remember that Google considers HTTP and HTTPS as two different protocols. It also considers https://www.example.com and https://example.com as two different websites.
You’ll need to make sure that you enter the correct URL of your website.
If you are unsure, then simply login to your WordPress admin area and go to Settings » General page. There you will see your website’s URL in the site address field.
After entering your website address, click on the ‘Continue’ button.
Next, you will be asked to verify ownership of your website. There are several ways to do that, but we will show the HTML tag method because it is the easiest one.
Click on the HTML tag to expand it and then copy the code inside it.
Next, you’ll need to add the code to your WordPress website so that Google can verify the ownership. However, this requires coding, which can be tricky for beginners.
Upon activation, you can go to AIOSEO » General Settings page and then click the ‘Webmaster Tools’ tab. Next, select the ‘Google Search Console’ option under Webmaster Tools Verification.
After that, go ahead and enter the code you copied earlier from Google Search Console into the ‘Google Verification Code’ box.
Don’t forget to click on the ‘Save Changes’ button to store your changes.
You can now go back to Google Search Console settings and click on the ‘Verify’ button.
Google Search Console will now look for the HTML tag in your website code and show you a success message.
That’s all. You have successfully added your site to Google Search Console. You can now click on the ‘Go to Property’ link to visit your Google Search Console dashboard.
Note: if Google Search Console cannot verify your website after you have added the code in Insert Headers and Footer plugin, then you need to make sure to clear your WordPress cache and try again.
2. Adding an XML Sitemap
An XML sitemap is a way for website owners to tell search engines about all the pages that exist on their website. It also tells search engines which links on your website are more important than others.
Adding an XML sitemap to your website helps search engines better crawl your website. While it doesn’t give you a boost in search rankings, it can definitely help search engines index your content more efficiently.
The best part is that if you installed All in One SEO (AIOSEO) in the first step, then the plugin automatically adds an XML sitemap to your site.
To see the sitemap, you can head over to All in One SEO » Sitemaps and make sure that the toggle for ‘Enable Sitemap’ is switched on.
The plugin will automatically generate an XML sitemap for your website, and you can find it at the URL that looks like this:
http://example.com/sitemap_index.xml
Don’t forget to replace example.com with your own domain name. You can now submit this URL in Google Search Console.
Next, head over to the Google Search Console dashboard and then click on the ‘Sitemaps’ option from the left column. After that, you can paste the URL and click the ‘Submit’ button.
Google Search Console will now check your sitemap and use it to improve your website’s crawling. You can go through our guide on how to add a sitemap page in WordPress for more details.
3. Connect Google Search Console to Google Analytics
Connecting Google Search Console to your Google Analytics account helps you analyze search console data in Google Analytics. This provides you with a new perspective on your top-performing content and keywords.
If you haven’t already done so, then you will need to install Google Analytics on your WordPress website.
We recommend using MonsterInsights for that. It is the best Google Analytics plugin for WordPress, and it will automatically show your top keywords from Google Search Console in your WordPress admin area.
To connect Google Search Console to your Analytics account, you need to head over to Google Analytics dashboard for your website. From the bottom left corner of the screen, click on the ‘Admin’ button.
Google Analytics will now switch to the admin view. From here, you need to click on the ‘Property Settings’ section and then click on the ‘Adjust Search Console’ button.
On the next screen, you need to click on the Add button to select your website.
Analytics will now take you to the Google Search Console website showing you the list of all websites you have added to the search console. Select the property you want to link to Google Analytics from the dropdown menu.
After that, you’ll need to select the Google Analytics property you’d like to connect with Search Console and click the ‘Continue’ button.
You’ll now see a popup window showing that you’ve successfully connected Google Analytics and Search Console.
That’s all. You have successfully connected your Google Search Console data to your Analytics account. You can go back to the Google Analytics Search Console settings page to see the connected Search Console and click the ‘Save’ button.
You can now view the newly unclocked Search Console reports in your Google Analytics account under Acquisition reports. It also helps unlock keywords not provided in Google Analytics.
The first report you will find there is the ‘landing pages’ report.
For each landing page, you’ll see the impressions (number of times a page appeared in search results), clicks, click-through rate (CTR), and average position in the search results. Combined with that page’s analytics parameters like bounce rate, sessions, and pages per session.
Clicking a landing page will show you the actual keywords that brought users to this landing page.
Next, you can Switch to the ‘Countries’ report, and you will see countries listed in the same order. This helps in creating content and geolocation marketing campaigns for people from different regions.
The devices report will show you how your site performed in desktop, mobile, and tablet search results.
Next, Queries are the most important of all reports among this data. It shows you the keyword data missing from your Google Analytics reports. You can see which search terms are driving traffic to your site.
4. Finding and Fixing Search Indexing Issues
The most helpful feature of Google Search Console is that you can troubleshoot indexing errors.
These errors can affect your search rankings by stopping the search engine from crawling and indexing the pages on your website.
You can easily locate these errors under the Coverage report.
It shows you which pages from your website are indexed by Google and which pages resulted in an error or a warning.
Next, scroll down, and you will see the detailed list of all the errors. Clicking on a link will open the detailed view, where you will also find the link to learn more about the error and how to fix it.
Following are a few common indexing errors you may see:
404 error – This error means that the crawler followed a URL and saw a 404 error.
Soft 404 error – This error occurs when the crawler sees a 404 error page, but the page’s status code is sending a 200 (success) message to the browser.
Server error – This means that your website server timed out or didn’t respond. This could happen if your website were under heavy traffic, was under maintenance, or unavailable for any other reason.
Not followed – This error occurs when Google is not able to follow a content type. This could be a flash, javascript, iframe, or other resources that the crawler cannot fetch.
Now let’s take a look at how to fix some of these crawl errors.
5. Fixing 404 Errors in Google Search Console
First, you need to keep in mind that not all 404 errors are equal. You can safely ignore some of them and only fix those that are actually an error.
For example, if you deleted a blog post and don’t want to redirect users to a newer post, then it is ok to let Google see a 404 error page. Google will eventually deindex that page if it keeps seeing the 404 error.
However, the reason Google wants you to look at those 404 errors is that you may not be aware of them. For example, you accidentally deleted something or forgot to redirect users to the new updated version.
Simply click on the error in the Index Coverage report, and it will show you all the pages displaying that error. Carefully review the pages and if you see a page that shouldn’t be there, then copy its URL and open it in a new browser window.
If you see a 404 error page in your browser, then this means that you need to fix this page.
Now, if it is a page that no longer exists but you have a newer or similar version of it, then you would want to redirect users to that page. See our guide on how to set up redirects in WordPress.
However, sometimes 404 errors may occur due to a misconfiguration in WordPress permalink structure. To fix this, simply visit Settings » Permalinks and then click on the ‘Save Changes’ button without changing anything.
6. Fixing Soft 404 Errors in Google Search Console
Soft 404 errors are a bit tricky to troubleshoot.
Basically, these errors occur when the Google bot sees what looks like a 404 error document instead of content. However, your server is sending a 200 (success) code. Normally, your server sends a 200 success code when a page is displayed without an error or redirect.
To resolve soft 404 errors, go ahead and click on the errors in the Coverage report to view the list of affected pages.
Now, you need to open the page in a new browser tab to see what’s happening. If the page displays correctly, then you can safely ignore the error.
On the other hand, if the page is showing a 404 error document, then you may want to investigate further.
Start by clicking the ‘Submitted URL seems to be a Soft 404’ link from the Coverage report. Next, you can open the link in a new tab to check if it’s not a false alarm.
If the page is valid and you want it to appear in the search results, then simply click the ‘VALIDATE FIX’ button. Google will then recrawl the page and change the status error.
If the WordPress search function causes the soft 404 errors you are seeing, then the easiest solution is to stop the Google bot from crawling search URLs.
To do that you need to add the following lines to your robots.txt file.
User-agent: * Disallow: /?s= Disallow: /search/
Usually, Google Bot doesn’t crawl search URLs. However, some spammers might try to spam Google search console reports by linking to search URLs with random strings. This way, they hope you will see their link in your Search Console report and click on it.
If the affected URLs are not searched queries, then you may want to redirect them to a proper page on your site.
7. Fixing Server Error in Google Search Console
Server Errors in Google Search Console are caused by a number of reasons. The most common of them is when your server times out during a crawl, throws an unexpected error or does not appear to be online.
Use the ‘URL inspection’ tool to make sure that the affected URL is working.
If it is working, then you can ignore the error. If you are on a reliable WordPress hosting provider, then most server errors would disappear automatically.
However, if you can confirm the error by visiting the URL, then there are several things you can do to fix it. See our list of most common WordPress errors guide to find a fix for the specific error message you are seeing.
8. Finding and Fixing Security Issues
Security issues not only stop Google from crawling your website, but they could also cause a sudden drop in search traffic. Google may temporarily remove affected pages, show a warning to users, and drop a page’s ranking.
Security issues will be highlighted on the overview screen as you login to your Google Search Console account. The most common security issue is websites affected by malware and trojans.
While security issues are automatically triggered, manual actions are the penalties that are imposed by human staff from the Google Search team after a careful review. If a manual action is taken against your website, then this is pretty significant and can immediately take away all your search traffic.
These manual actions usually occur when a website is involved in illegal activities, spamming, and other fraudulent or fishy activities.
Clicking on the Manual Actions link will show you the actions in your search console report. You will also find detailed information about the issue that triggered it and how to clean it up.
Once you have removed the objectionable content, you can click on the request review button. Your website will now be reviewed and reconsidered by the Google Search team, and they can decide on removing the penalty.
10. Using Google Search Console To Grow Traffic
Now that we have covered the technical bits, let’s get to the fun part of growing your website traffic by utilizing the data available in Search Console.
Google Search Console helps you uncover keyword data, find out your top-performing keywords, and discover hundreds of potential keywords where you can easily rank and get more traffic.
We will also look at links and how to use them to improve search rankings.
Ready? Let’s get started.
11. Mining Keyword Data in Google Search Console
Keywords are the search terms users type in search engines to find information.
Marketers and website owners can optimize their content to target desired keywords and improve their chances of appearing on top in search results.
Previously, keyword data was available in website stats and analytics reports in Google Analytics. However, Google encrypted that information in 2013 when they switched to HTTPS.
As a result, if you try to view search queries in Google Analytics, you’ll most likely see ‘not provided’ keywords. A simple solution to this issue is connecting Google Analytics with Search Console.
You can also view the keyword data in your Google Search Console reports.
It gives you a full view of the keywords your website is ranking for, average position, clicks, and impressions (number of times your site appears for that keyword).
You can see this information in your Google Search Console reports under the ‘Performance’ tab.
On the top, you will see a graph of your website’s performance in search results. Below that, you will see the keywords data, which you can filter by position, impression, and click-through rate.
You can sort this data by clicking on any column or using the filter option to narrow down the results.
You can also switch to the Pages tab to see the performance of your pages in search results.
Clicking on any page in the list will filter the results for that page. You can then switch to the ‘Queries’ tab to see the keywords that bring the traffic to that particular page.
Now that we have covered how to browse and view this data, let’s see how actually to use this in your SEO and content planning.
12. Finding Low-hanging Keywords That You Can Easily Rank
A lot of your pages may be ranking on page 2 or 3 of Google search results for different keywords. These are the keywords that you can quickly work on to rank higher and get more traffic.
Let’s find out those keywords.
In your Performance report, click on the filter icon and then select the ‘Position’ option. Next, you’ll be looking for keywords where the average position is higher than 7.
Search Console will now only show the keywords where your site appears on an average position of 7 or higher. Now, click twice on the position column to sort the list in ascending order.
As you scroll down, you will find tons of keywords that rank between 7 and 30. All these keywords are low-hanging fruits where you can easily rank higher.
To view more results, scroll to the bottom and select a higher number for ‘Rows per page.’
When choosing the keywords to work on, you would want to choose keywords based on their number of impressions. Higher impressions mean more search traffic for those keywords.
To do that, you can export the data in CSV format and then open it in spreadsheet software.
Now that you have mined the low-hanging keywords with higher impressions, the question is how do you improve your rankings for those keywords?
Here are some tips to help you improve your rankings for those keywords.
1. Improve the content by adding more useful information
The #1 reason your page isn’t ranking for a keyword is that Google finds other content more valuable. To counter that, you need to review your article or blog post and add helpful content.
Look at the articles ranking on top five positions for that keyword and cover all the information that your article is missing in more detail.
We are not saying that you should just add more text to it. You need to make it more useful, informative, and comprehensive.
2. Evaluate On-page SEO
Use All in One SEO (AIOSEO) to improve the on-page SEO score for that article. It gives practical tips on improving a page by analyzing the content, keyword density, title, readability, links, and more.
You can also check out our guide on the SEO audit checklist to boost your rankings.
3. Increase time users spend on that page
Google considers it a success when users click on a search result and spend time viewing it. This means your content needs to be highly engaging and instantly provide users with the information they were looking for.
Here are some crazy simple things you can do to increase user engagement.
Use images – users find images much easier to look at than text. Adding more images makes it easier for users to scan the information and keeps them engaged.
Use videos – Videos are the most engaging form of content available. Adding video to a page significantly increases the time users spend viewing that page.
Make text more readable – Use smaller paragraphs, lots of white space, simpler sentences, and keep your style casual and conversational. All these things make reading easier for users.
Links play an important role in WordPress SEO. Search engines use them as a metric to determine how important a page is and where it should rank in search results.
The Links report in Google Search helps you see your website’s performance in terms of links.
It shows you external links, internal links, top linking sites, and top linking text. More importantly, it shows top linking sites, how often they link to your site, and how many pages they link to.
Let’s see how you can use these reports to get more backlinks, improve internal links, and boost your rankings.
14. Getting More Backlinks from Third-Party Websites
Search console shows third-party websites that have linked to your site in the ‘Top linking sites’ report. You can expand the report by clicking on the ‘More’ link at the bottom.
If you click on a domain name to expand the report, you will see all the pages they have linked to. Next, click on each page to get the exact URL linked to that particular page.
You can now use this data to get more backlinks for your site. Simply visit the website and see how they have linked to you. After that, see what other content they have where your site can be linked from.
Next, simply reach out to the website via email or contact form on their website.
First, thank them for linking to your article and then politely mention that they may want to include a link to an article of yours.
Now, this direct approach may not always work. In that case, you need to be creative. You can offer them to write a guest post for their blog, leave comments on their articles, follow them on social media, or retweet their articles.
Repeat the process for all important external links on your website. With consistent effort, you can get proper backlinks without spending any money.
15. Improving Internal Links to Boost Rankings
It is harder to get third-party websites to link to your content. However, it is way easier to link to your own content from your own site. This practice is called internal linking.
Internal linking helps search engines understand the context and relationships among different pages on your website. It also helps them understand which pages are important based on how often you have linked to them.
This is why you should make internal linking a habit when writing new content on your website or blog.
Now let’s see how to use the links reports in Search Console to help you build internal links.
In Google Search Console, click on the Links report and then click on the ‘More’ link under the ‘Internal Links’ column. The report shows how often you have linked to other pages on your site.
Go ahead and click the filter icon and then select the ‘Target page’ option.
Search Console will now show you how many pages are linking to this page. You can now compare it with other pages and see whether pages with more internal links are ranking higher than posts with many internal links.
If that’s the case, then go ahead and start adding internal links to pages that you want to rank higher. Make sure you are only linking to the article when it makes sense. Adding links where they don’t make sense would create a bad user experience.
16. Using Core Web Vitals in Search Console
Did you know that Google now considers your website loading speed as a ranking factor?
In 2020, Google introduced Core Web Vitals that measures how fast your website is and help the search engine measure your site’s user experience.
In Google Search Console, you can view the ‘Core Web Vitals’ report under the Experience menu on your left. It provides a complete report about your site’s speed score for mobile and desktop.
The best part is that you also get recommendations on how to improve your Core Web Vitals score and improve your site’s load time.
For more information, please refer to our guide on how to boost WordPress speed and performance.
17. Create Rich Snippets for Your WordPress Pages
Rich snippets or schema markup allows Google to display additional information in its search results. These include star ratings, prices, reviews, and more.
Rich snippets make your page more noticeable in the search results. As a result, you get more clicks and website traffic.
Many WordPress themes automatically include some basic structured data. If you publish recipes, run a reviews site, or an online store, then rich snippets can give your site an SEO boost.
Google Search Console makes it very easy to find pages that are displaying rich snippets. It also shows the type of rich snippets for your website.
You can view them by going to ‘Overview’ and then scrolling down to the ‘Enhancements’ section.
The real useful part is that the report allows you to quickly look at pages that have errors while displaying rich snippets so that you can fix them.
18. Using Search Console to Improve Mobile Usability
Nearly 63% of all Google searches in the United States come from mobile devices. That’s why Google gives an SEO bump to mobile-friendly websites in the search results.
Google has a Mobile-Friendly test tool that allows you to quickly examine a page. The Mobile Usability report in Search Console tells you how Google sees your entire website in mobile performance.
If you see errors on this page, then this means that these issues may affect your site’s rankings.
To see the affected pages, you can scroll down to the ‘Details’ section and click on the error.
Poorly coded WordPress themes or plugins cause most mobile usability issues. The easiest way to fix those issues is by using a better responsive WordPress theme.
19. Use URL Inspection Tool in Search Console
The URL Inspection tool in Google Search Console provides information about a page if it’s on Google search results or not.
You can check the status of a page and also request Google to recrawl a page. To start, simply enter a URL in the top search bar.
Google Search Console will then show you the status of the page is indexed by Google. If it’s not indexed, then you’ll see a message saying ‘URL is not on Google.’
You can click the ‘Requesting Indexing’ button and request Google to manually fetch the page from your website.
Besides that, you can scroll down and see more details in the ‘Coverage’ report. It will show information about sitemaps, crawl history, and indexing.
You can also live test a URL and see if there is an indexable version available. If there is, then simply click the ‘Request Indexing’ option.
20. Removing URLs from Google Search
So far, we have focused on using Search Console to get your content indexed and improve rankings in Google Search. However, sometimes you may want to remove content from Google Search as well.
One way to do this is to add a noindex meta tag to the page you want to remove from search results. However, depending on how often Google crawls your website, this could take some time before your page actually disappears from search results.
Search Console’s Remove URL tool allows you to request a URL to be removed from the search results. Simply click on ‘Removals’ under Index in the menu on your left.
Now click on the ‘New Request’ button, and a popup window will appear. Go ahead and enter the URL you want to remove, select whether you want to remove this URL only or with this prefix, and click the ‘Next’ button.
Google will now block the URL from its search results for about six months. You can add as many URLs as you want and see them in the Removals section in the Search Console.
21. Adding Users to Access Google Search Console
If you have a marketing team or you have hired someone to help you with SEO, then those users may need access to Google search console data.
Search Console allows you to easily add users and give them access to view all reports without sharing your Google account credentials with them.
To add a new user, simply click on the Settings » Users and permissions option under Property settings and then click on ‘Add User’ button.
Next, you need to provide the user’s valid Google account email address and select permission to grant them.
There are two types of permission levels. The full permission level will give them access to everything, including the ability to add new users. Restricted permissions will allow them to view the data but not add new users.
After choosing a permission level, click on the ‘Add’ button to save your changes.
The user you added will now receive an email notification, so they can login and view Google Search Console data for your website.
Helpful Resources
Following helpful resources on WPBeginner will help you further improve your website’s performance in search engines.
Ultimate WordPress SEO Guide – Our complete step by step WordPress SEO guide will walk you through complete WordPress SEO setup like a pro.
WordPress Performance Guide – Step by step guide to improve your WordPress speed and performance for higher search rankings and better user experience.
WordPress Security Guide – Keep your WordPress site secure with this complete WordPress security guide for beginners.
Tracking User Engagement – This guide helps you learn how to track user activity on your website and use it to plan your growth strategy.
Convert visitors into Customers – If you run an online store, then this guide will show you how to convert search traffic into paying customers.