How to Use AI to Generate Images in WordPress

Do you want to use artificial intelligence tools like DALL.E to generate images in WordPress?

AI-generated images can be a good alternative to generate images for your WordPress blog posts without worrying about copyright.

In this article, we’ll show you how to use AI to generate images in WordPress.

Why Use AI Tools to Generate Images for Your WordPress Website?

There are a ton of paid stock image websites offering images to use on your WordPress website for a small fee.

However, the cost of these images is an extra expense. Most bloggers and small businesses don’t have the budget for that.

There are certainly many websites that offer royalty free images like Unsplash or ShutterStock‘s limited free library.

But those images are highly overused and often too generic.

Now, the best way to create images for your website is by making your own images or using your own photographs. But not everyone is a professional photographer or digital artist.

This is where artificial intelligence comes in.

AI tools like DALL.E can generate unique artwork from text descriptions provided by the users.

These images are not only unique but highly creative and artistic.

For instance, here is an image of an office desk with a sunset backdrop generated by DALL.E 2. It mimics the style of generic stock image photos that you can find on hundreds of websites.

Now take a look at this example of an artwork created by DALLE.2.

This one is artistic, more colorful, and in a comic book style.

You can see the variety of styles, topics, and ideas you can use on the DALL.E homepage.

The best part is that you are free to use these images for your blog posts, articles, and even landing pages.

That being said, let’s take a look at how to easily use AI-generated images in WordPress.

We’ll be showing you two methods using two different AI tools, you can choose one that works best for you.

1. Generate AI Images for WordPress with DALL.E 2

DALL.E 2 is an Artificial Intelligence tool made by Open A.I. It is quite popular for its artistic rendering, surrealism, creativity, and versatility.

There are no plugins available to integrate DALL.E 2 directly with your WordPress website.

However, you can create images on DALL.E 2 website and download them to your computer. After that, you can upload those images to your WordPress website.

First, you need to visit the DALL.E 2 website and sign up for a free account which gives you 50 credits for your first month.

Upon signing up, you’ll see the DALL.E dashboard with a prompt field and some recent artworks generated by DALL.E.

Type a text description of the image that you want to generate in the prompt field. You can be as descriptive and creative as you want.

Click on the Surprise Me button to see some examples of prompts you can generate.

Once you click on the Generate button, the AI will generate images based on the prompt you provided and show you four results.

You can download all of them to your computer if you want. You can also click on any of the generated images to edit them.

The image editor in DALL.E allows you to expand the frame or pan in. You can also erase or retouch an area of the image.

Click on the Generate button again for AI to regenerate the image based on your changes.

Once you have downloaded the images to your computer you can switch back to the admin area of your WordPress website.

You can now upload the image to your WordPress media library by visiting the Media » Add New page.

You can also add an image directly to your WordPress posts and pages. Simply edit the post or page where you want to display the image.

On the post edit screen, add the Image block and then upload the image from your computer.

What is The License Used for Images Generated by DALL.E 2?

You retain the copyright for the images generated by the prompt provided by you to DALL.E 2.

You can use the images anywhere you want including your WordPress website, YouTube videos, eBooks, magazine, and more.

2. Use Imajinn to Generate AI Images in WordPress

For the first method, we’ll be using Imajinn AI to generate images in WordPress.

Imajinn AI is similar to the tools like DALL.E 2, Midjourney, and Stable Diffusion. It generates images using artificial intelligence based on the prompt you provide.

First, you need to install and activate the Imajinn plugin. For more details, see our step-by-step guide on how to install a WordPress plugin.

Note: The base plugin is free and gives you 10 credits. After that, you can buy more credits from the plugin’s website.

Upon activation, you need to visit the Media » Imajinn AI to configure plugin settings and generate images.

First, you need to sign up by providing an email address and password to create your account.

After that, you will be able to start generating images using Imajin AI.

Simply provide a detailed prompt describing the image that you want to generate.

You can also choose from a list of styles, artist style, style modifier filters, and aspect ratio to further customize your prompt.

Below that you can choose to click on the Summon button to launch the Prompt Genie tool.

Based on the prompt description you provided the tool will suggest further prompt ideas to generate the best possible image.

You can click on the generate button to use a suggested prompt, or continue writing your own prompt by copying ideas from the suggestions.

Once you are satisfied, click on the Generate button to continue.

The plugin will now start generating images using the AI tool running on the cloud. Once finished, it will display four variations of images for you to choose from.

Below each image, you’ll find options to share the image, repair faces (The AI is not great at generating human faces), or touch up the image.

You can also just click on the Save button to store an image in your WordPress media library.

To use the image in your WordPress posts and pages, simply edit the post or page where you want to add the image.

On the post-edit screen, add the Image block where you want to display the image and then click on Media Library.

Next, you need to select the image you saved earlier from your Media Library and provide an Alt text for the image.

After that, go ahead and click on the Select button to insert the image.

The plugin also comes with a Imajinn block that you can add to your post or pages and generate an image inside the block editor.

What is The License Used for Images Generated by Imajinn AI?

All images generated by Imajinn AI are provided under the free domain or CC0 license.

You are free to use them on your website as you see fit.

We hope this article helped you learn how to use Artificial Intelligence to generate images for your WordPress website. You may also want to see our ultimate image SEO guide and these easy tips to optimize images for speed.

If you liked this article, then please subscribe to our YouTube Channel for WordPress video tutorials. You can also find us on Twitter and Facebook.

The post How to Use AI to Generate Images in WordPress first appeared on WPBeginner.
How to Create a Simple Event Calendar with Sugar Calendar

Do you want to add an event calendar to your WordPress website?

A calendar is a great way to share in-person and virtual events with your visitors. You can use one to promote your upcoming events, get more people to attend, and help with brand awareness.

In this article, we’ll show you how to easily create a simple event calendar in WordPress with Sugar Calendar.

Why Create a Simple Event Calendar For Your WordPress Website?

By adding a calendar in WordPress, you can show upcoming events to your visitors.

This makes it easy for people to learn about your upcoming webinars, virtual retreats, online sermons, coaching calls, and more. In this way, a calendar can promote your events and encourage more people to attend.

If you have a membership website or a forum, then you can even accept user-submitted events. This is a great way to build a community, attract new visitors, and keep your calendar updated with the latest events. You’ll also save time since you don’t need to research upcoming events and add them to the calendar yourself.

With that being said, let’s see how you can add a simple event calendar to your site.

How to Create a Simple Event Calendar in WordPress

The easiest way to add an event calendar to WordPress is by using Sugar Calendar. It is the best WordPress calendar plugin and has everything you need to create multiple calendars, set start and end times for your events, sync with Google Calendar, and more.

The first thing you need to do is install and activate the Sugar Calendar plugin. For more details, see our step-by-step guide on how to install a WordPress plugin.

Upon activation, head over to the Calendar » Settings page. Here, you can enter your license key into the ‘License Key’ field.

You’ll find this key by logging into your Sugar Calendar account. It’s also in the email you got when you purchased Sugar Calendar.

After that, click on the ‘Verify’ button to check that your license key is valid. Finally, you can click on ‘Save Changes’ to store your settings.

Once you’ve done that, you’re ready to create a calendar by going to Calendar » Calender.

Here, click on the ‘Calendars’ tab.

You can now click on the ‘Add Calendar’ button.

This opens a popup where you can type a title into the ‘Name’ field. Sugar Calendar lets you create multiple calendars, but it only adds a single calendar view to your site. Visitors can switch between the different calendar views using a dropdown menu.

That being said, the ‘Name’ should help visitors tell the difference between the various calendars.

Similar to child pages, you can arrange calendars in parent-child relationships.

Children appear beneath their parents in the WordPress dashboard, so this can be a useful way to organize your calendars. This is particularly true if you have lots of different calendars.

All calendars are parent calendars by default. To create a child calendar, you’ll need to open the ‘Parent’ dropdown and then choose the calendar that you want to use as the parent.

Next, you can add an optional description. Depending on your WordPress theme, this may appear next to the calendar on your website, but not all themes show the calendar description. If you do add a description, then always check that it shows up on your WordPress website.

Finally, you may want to add a color that will appear next to the calendar in your WordPress dashboard. This color-coding can help you group related calendars together, or easily identify a particular calendar.

To add a color, simply click on the ‘Select Color’ switch and then make your selection using the controls that appear.

When you’re happy with the information you’ve entered, click on ‘Add New Calendar’ to go ahead and create your first Sugar Calendar.

You can create multiple calendars simply by repeating the same process described above.

Adding Events in Sugar Calendar

Once you’ve created a calendar, you’re ready to add events to that calendar.

To start, select the ‘Events’ tab and then click on the ‘Add Event’ button.

You can now add all the information about your event, such as date and time, duration, and whether or not it is recurring.

First, you’ll want to go ahead and give the event a name.

Then, add a start time and end date. If the event will last all day, then you can simply check the ‘All-day’ box.

Another option is to set a start and end time, as you can see in the following image.

By default, Sugar Calendar creates all events as one-time events. However, some events are recurring. For example, you might run a webinar every Monday morning or have a monthly meetup for all the volunteers at your nonprofit organization.

To create a recurring event, simply select the ‘Recurrence’ tab, and then choose an option from the ‘Repeat’ dropdown, such as Daily, Weekly, or Monthly.

You can also set an optional ‘End Repeat’ date, which is when the event stops recurring. For example, you might only plan to run webinars until the end of the year.

If you’re organizing an in-person event, then you can also select the ‘Location’ tab and type in where this event will take place.

Next, enter some information about the event in the ‘Details’ box.

This works exactly the same as the WordPress classic editor so you can add images, videos, and formatting.

You can also add a featured image, which will appear on the event’s page. This can make the page more engaging and may also be used in search results and on social media news feeds.

To add a featured image, simply click on ‘Set featured image’ and then either choose an image from the media library or upload a new file.

In the ‘Calendars’ section, find the calendar where you want to add this event.

You can then click to select its radio button.

You can also create a new calendar in this section, simply by clicking on the ‘Add New Calendar’ button.

This adds some settings where you can give the new calendar a name and assign it an optional parent calendar.

Once you’ve entered all the information, just click on the ‘Publish’ button.

You can repeat this process to add more events to the calendar.

Putting Your Events Calendar on Your Website

You can add a calendar to any post or page using shortcode. If you’ve created multiple calendars then visitors can switch between these different calendars using a dropdown.

We’ll add the calendar to a new WordPress page, but the steps will be similar no matter where you’re adding the calendar.

First, go to Pages » Add New in your admin panel. If you want to add it to an existing page, simply click ‘Edit’ under its name on Pages » All Pages.

Then, give your page a title and add any categories and tags that you want to use.

You can then click on the ‘+’ icon to create a new block and type in ‘Shortcode.’ When the right block appears, click on it to add it to the page.

Next, copy the shortcode[sc_events_calendar] into the shortcode block. For more details, please see our guide on how to add a shortcode in WordPress.

You can now publish or update the page to make the calendar live on your website.

To see more information about an event in the calendar, simply click on it.

This will open the event’s page showing the time, date, and any other details.

Sugar Calendar also has a widget that you can add to any widget-ready area of your WordPress theme. This is an easy way to add a calendar to every page of your website or WordPress blog.

The widget also lets you set a default calendar, which will be selected in the dropdown menu. This gives you more control over which events visitors see.

To add a widget in WordPress, simply go to Appearance » Widgets. Here, click on the blue ‘+’ button.

You can then type in ‘Sugar Calendar.’

There are a few different Sugar Calendar widgets, so make sure you select the ‘Event Calendar’ widget.

Now simply drag and drop the widget onto the area where you want to show the calendar.

At this point, you can add an optional title and change the size of the calendar.

To change the default calendar, open the ‘Calendar’ dropdown and then choose an option from the list.

By default, Sugar Calendar will show the current month when the page loads, but you may prefer to show a different month instead. To make this change, simply type a new date into the ‘Default Month & Year’ field.

Once you’re finished, don’t forget to click on the ‘Update’ button. Your Sugar Calendar widget will now show up on your site!

We hope this article helped you learn how to create a simple event calendar with Sugar Calendar. You might also like our article on the best email marketing services and best push notification software, so you can keep your users updated about new events and activities.

If you liked this article, then please subscribe to our YouTube Channel for WordPress video tutorials. You can also find us on Twitter and Facebook.

The post How to Create a Simple Event Calendar with Sugar Calendar first appeared on WPBeginner.

How to Make Google Fonts Privacy Friendly (3 Ways)

Are you concerned about the privacy issues and legal risks of using Google Fonts on your WordPress site?

Google Fonts have been found to breach the EU’s privacy regulations. That means if you have website visitors from Europe, then you may be at risk of paying legal damages.

In this article, we’ll show you how to make Google Fonts privacy friendly in WordPress.

Why Are Google Fonts Not Privacy Friendly?

Your WordPress website’s typography plays an important role in your design and brand identity. That’s why many website owners customize their typography by using Google Fonts.

However, when someone visits a website that uses Google Fonts, their IP address is logged by Google when the fonts are loaded. This is done without their permission and the European Union considers it a breach of privacy regulations.

This means that websites using Google Fonts are no longer GDPR compliant. That’s an important legal consideration if you have website visitors from the European Union because it may make you liable for damages (of course you should consider your legal advisors before taking any action).

With that being said, let’s take a look at how to make Google Fonts privacy friendly. We’ll cover three methods, and you can use the list below to jump to the one you wish to use.

Method 1: Host Google Fonts Locally in WordPress

One way to make Google Fonts privacy friendly is to host them locally in WordPress. Luckily, that’s easy to do by using a plugin.

The first thing you need to do is install and activate the OMGF (Optimize My Google Fonts) plugin. For more details, see our step-by-step guide on how to install a WordPress plugin.

Upon activation, you need to visit Settings » Optimize Google Fonts to configure the plugin. You will see a statement that the default settings will automatically replace your Google Fonts with locally hosted copies.

All you need to do is scroll down the page and make sure that the ‘Font-Display Option’ has the default setting of ‘Swap (recommended)’ selected.

After that, simply click the ‘Save & Optimize’ button at the bottom of the page.

You’ll see a message at the top of the screen that says ‘Optimization completed successfully.’ Your Google Fonts are now hosted locally.

To learn more, see our guide on how to host local fonts in WordPress, including how to do this manually without a plugin.

Method 2: Replace Google Fonts With Bunny Fonts

Bunny Fonts is an alternative to Google Fonts that puts privacy first. Their zero tracking and no-logging policies help you stay fully GDPR compliant. The Bunny Fonts API is fully compatible with the Google Fonts API, and this makes switching simple.

All you need to do is install and activate the Replace Google Fonts with Bunny Fonts plugin. For more details, see our step-by-step guide on how to install a WordPress plugin.

There will be no configuration needed. Once you’ve activated Bunny Fonts, they will immediately replace Google Fonts on your WordPress blog, shop, and every other part of your site.

Method 3: Disable Google Fonts in WordPress

Another way of avoiding the privacy issues of using Google Fonts is to disable them altogether, and simply use the system fonts installed on your users’ computers. We did this when we redesigned the WPBeginner website, and it improved our page load times.

Simply install and activate the Disable and Remove Google Fonts plugin. For more details, see our step-by-step guide on how to install a WordPress plugin.

Upon activation, the plugin will automatically disable all Google Fonts used by your theme and plugins. It doesn’t need to be configured.

Now WordPress will automatically use a default font in place of any Google Fonts that were being used. If you would like to choose different fonts, then see our guide on how to change fonts in your WordPress theme.

You can learn more in our guide on how to disable Google Fonts on your WordPress website.

We hope this tutorial helped you learn how to make Google Fonts privacy friendly. You may also want to learn how to get a free email domain, or check out our list of ways to make money online blogging with WordPress.

If you liked this article, then please subscribe to our YouTube Channel for WordPress video tutorials. You can also find us on Twitter and Facebook.

The post How to Make Google Fonts Privacy Friendly (3 Ways) first appeared on WPBeginner.

Google Ads Latest Update Removes Search Term Data

Imagine checking your Google Ads notifications and seeing this update: Google Ads removes search term data for advertisers.

That happened and it was not a fun experience for any of us. Most advertisers working with smaller budgets not working in a niche or mainly targeting broader more volume-heavy keywords with their search campaigns paid no mind to it.


We knew it could mean some important changes are on the way for advertisers like us who handle clients in various niches and that market to people with very specific needs. Specific needs + niche means that the search volume is limited and that meant we could face the effects of this update come September.

Well, September is already here, what did we find?

Before we dive into that, let’s take a look at what actually changed and why Google decided to do this.

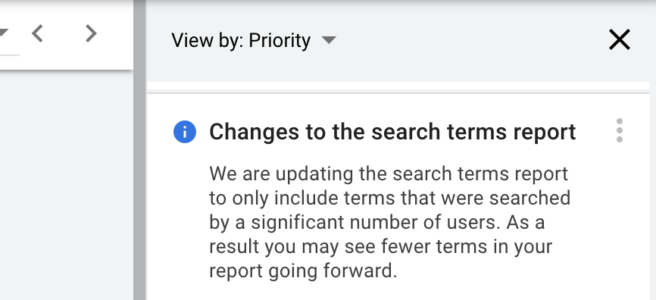
On Google’s Search Terms Report support page they state,

“Starting September 2020 [AKA now], the search terms report only includes terms that a significant number of users searched for, even if a term received a click. You may now see fewer terms in your report.”

What Does It Mean When Google Ads Removes Search Term Data?

It means that your beloved Search Terms report that you rely on to derive insights and optimize your campaigns, will start seeing less data show up in it based on the actual volume or the popularity of the search term itself. This is regardless of the fact if the search term results in clicks or conversion for your campaigns.

One more important thing to note here is that the search term in question will be looked at globally. Let us explain:

Search Term A: Relative Popularity = 90

Search Term B: Relative Popularity = 5

Because of this update, Search Term A could only be clicked on once in your Google Ads Search Campaigns and it would show up in the Search Terms Report but Search Term B could be clicked on 30 times but still not make it in the report.

Our Findings:

To determine how the Google update has impacted accounts, we crunched some numbers for one of our clients that has $20,000 monthly spend, and here is what we found: 

99 Robots Excel Chart

Allow us to put into words what you’re seeing.

Before the update, you could lose data on anywhere from 1% to up to 5% of your ad spend. Now after the update went into effect in September, it’s a different story altogether, we’re seeing days where we’re losing 59% of the ad spend data in the Search Terms report.

This is huge, as the search terms report is often looked at when you want to add negatives to the campaigns that do not amount to any conversions. The report helps advertisers everywhere keep a tight leash on their spend and allows them to cut back on wasted ad spend and have them put it towards more valuable keywords that bring in the audience with the right intent and which also converts.

How to See if You’re Affected by This

It’s simple, you need to calculate the visibility of your data, you will calculate the visibility of a specific metric hence the formula will be:

Search Term Visibility = (SUM of [metric] from Search Term Report) / (SUM of [metric] from Search Network Data)

So if you’d like to find out the visibility of the ad spend from your Search Term report then that formula will become:

Search Term Visibility = (SUM of Cost from Search Term Report) / (SUM of Cost from Search Network Data)

What Does This Mean for Advertisers?

We all have methods we employ to weed out the low volume, irrelevant, and poorly performing keywords from our Search campaigns. Now, with this update, a lot of those keywords will fall through the cracks since you will lack visibility on them. Regardless, advertisers like us managing millions in ad spend for our clients will always find ways to combat this and ensure that the conversion data and performance (bottom line) for our clients does not get affected.

Google has already been busy releasing updates and pushing advertisers more towards it’s automated ad products for a while and this is just another nudge from them in that direction where you rely on the machine learning of their algorithm to derive results and keep human intervention in the campaigns to a minimum.

Let us know what you think about this update or reach out to us if your business needs help demystifying the world of PPC.

The post Google Ads Latest Update Removes Search Term Data appeared first on 99 Robots.

How to Backup Your Google Ads

One of the most important things you can do is backup your Google Ads account. Whether big or small, all Google Ads accounts have an exorbitant amount of details that go into making their campaigns successful or just work correctly in the first place. From targeting options to negative lists, placements, bids, locations adjustments, tracking templates, etc. There is too much valuable data on the account for you to just wait for your account to be disapproved and then do something about it.

“But I’ve never had a disapproved account”

“We only advertise for registered reputable businesses so we will never get disapproved”

Okay, how about when a media planner on your team nukes your account? What then? We all know how tedious the Google Ads History feature is, it’ll be almost impossible to revert the account to a previous state when your campaigns were working fine before your intern or junior messed all of it up.

So What’s the Answer… Backup Your Google Ads!

BACKUPS, it’s simple, whether you are an agency or a solopreneur or a freelancer. It is essential that you keep regular backups of the accounts you manage so as to revert back to them in case you have issues with your Google Ads account.

What Do You Need?

For advertisers like us that manage hundreds of accounts, there is only one tool that allows us to create backups of our Google Ads accounts.

Meet the Google Ads Editor.

Google Ads Editor is a free downloadable software from Google that connects to your Google Ads account and allows you to edit your campaigns and manage your accounts as you would through their web platform.

It’s considered a high-level tool with access to more functionality than what you find in the browser version of Google Ads.

We’ll be making use of one such feature here to create backups.

How to Use Google Ads Editor

First, download the Google Ads Editor

Once downloaded; install and open it. You’ll be greeted with the Accounts Manager window.

Here, click on +Add to connect your Gmail account and gain access to your Google Ads accounts.

Once you’re successfully logged in, you would have all of the accounts that you have access to on this screen.

Click on whichever account you want to backup and click Open.

This is where you can make changes to the campaigns, do a lot of bulk edits or even import campaigns from other accounts here.

Note: All changes made to the campaigns (Bids, Targeting, Optimizations, etc) will have to be done and then in order to be made permanent on the account, you would have to click on POST in the top right corner.

Changes made on the account using this tool are not implemented until you click Post.

How to Make Backups

To make backups of your accounts, select ‘Account’ from the menu bar, and choose Export.

Export gives you the option to have 4 types of exports:

Export whole account creates a backup of the entire account.

Export selected campaigns and ad groups create a backup of all the campaigns and ad groups that you select.

Export current view creates a backup of the view in the account explorer, If you have some campaigns filtered based on some rules then this will create a backup of what’s on the screen.

Export custom rules creates a backup of the custom rules that you have set on the account.

Since we’re backing up the entire account, we’ll use Export whole account from the list.

When exporting, it’s important that you select the save as type option to “CSV files with Images in ZIP archives” if you want to see all of the data that is exported.

If you just need the backup to use with the Google Ads Editor and use the Import option here later then the Save as Account archives (.aes) will also work.

The exported zip or the AES file can be imported into the Google Ads Editor for any account that you have access to.

A couple of notes about the zip exports, the images from your display campaigns are not named the same as what you uploaded them as. However, since you’ll be importing them using the entire zip file or AES file into the Google Ads Editor then the software will match them to the right campaign and adgroup so it’s not a cause for concern.

What is Not Covered in the Backup

Pixel data or audience information from the campaigns are not saved in the export, that data still lives on the account and will be called on when you import it into the same account.

In the case of importing the campaigns to a different account that does not have access to that pixeled audience will give you the “Missing or ambiguous audience” error.

How Often Should I Backup

We believe that you should back up your Google Ads account every week to stay up to date with the changes being made on the account, the editor names them for the date the export is made so maintaining them and reverting to a prior state should be very easy.

Now go out there and never lose even a single datum of your Google Ads account.

The post How to Backup Your Google Ads appeared first on 99 Robots.